WELCOME!


Powered by IP2Location.com

Wednesday, March 9, 2011

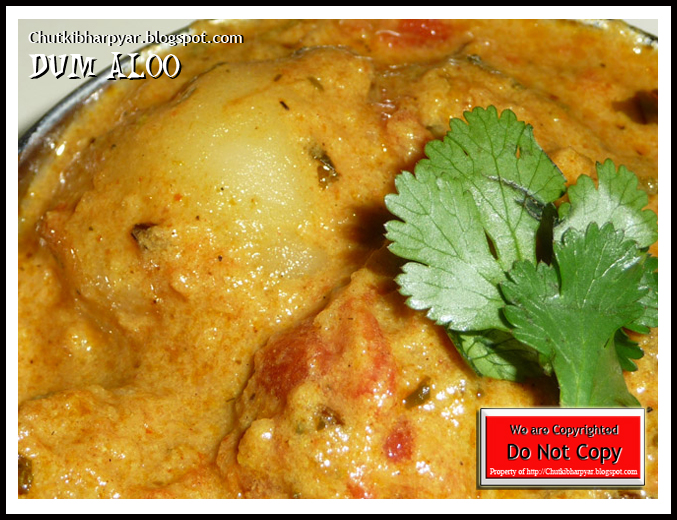
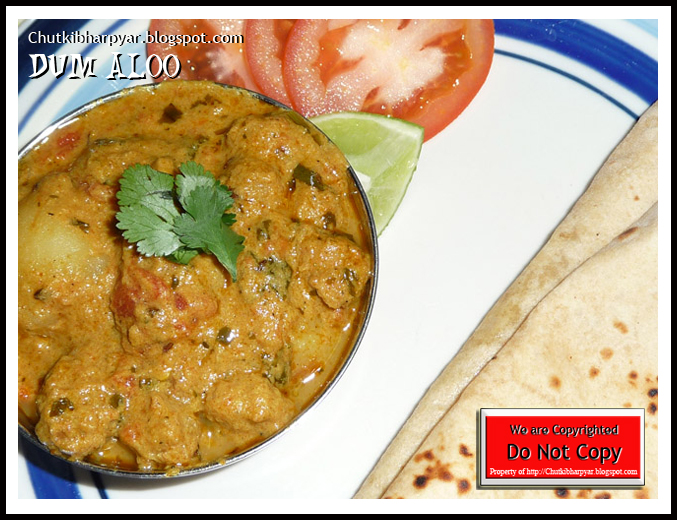
Dum Aloo


I love potatoes in all form. Fried, mashed, roasted, boiled, baked anyway u give it to me and I will eat it. I guess this is same with many people...now who doesnt love potatoes. It a boon veggie for moms. I dont know a single kid who hates potato. But beware it id not good for health when fried and roasted in oil. It is a starch and full of carbs so having too much of it is not advisable for ur tummies.

I always used to love the roasted Baby potatoes (Asokan as named by and dad and uncles) my granny used to make. She always used to make it along with Arachuvitta vengaya sambar (onion sambar). Yumm! what an terrific combination it used to be. Or the Aloo saag and mixed veggie curry my mom used to make to go along with phulkas. These were the main curry forms of potato I was accustomed to at home. So when it came to making Dum aloo It was a new dish for me as I have never tasted this before (even in restaurants or at home) never seen anyone make it too..although I have heard the name several times. One solace was that it was made of roasted mini potatoes (just like the Asokan my granny used to make.) and hence I jumped into trying this recipe for the first time. I followed this recipe....mainly coz it didnt ask me to deep fry the potatoes unlike many. I made few changes but nothing major. So here goes..:)

Ingredients :

Small red potatoes / baby potatoes - 5 to 6

Oil - 1 tbsp + 1tbsp

Curd or yogurt - 4 tbsp

Kasuri methi - 1 tsp crushed

Turmeric powder - 1/2 tsp

Kitchen king Masala - 1 1/2 tsp

Garam Masala powder - 1 tsp

Coriander-cumin powder - 2 tsp

Fresh coriander leaves for garnish

Tomato puree / canned tomato sauce - 1 small can

Ground Masala paste ( of 1 medium onion, ginger- 1" piece, garlic - 4 pods, Green chilli - 1 ground without adding water)
Method :

Preheat the oven to 350 degree F.

Boil the mini potatoes and peel them. Now poke holes in it using a fork. Now spread the potato on a baking tray and coat them with some oil. Place the potatoes in the preheated oven and let it roast for 20 minutes until the skin becomes lightly crispy.

For the gravy take the rest of the oil in a non stick pan and add the ground masala and saute well until the raw smell of onion goes off. Add the tomato puree and cook well till the tomato puree cooks well and the sauce reduces a bit. Add water if the gravy is too thick. Add the masalas (garam masala, KK masala, CC powder and salt and mix well. Let it simmer for 30 minutes or so.

Add the baked potatoes to the gravy and coat it well with the tomato gravy.

Beat the curd well in a small bowl and pour it on the potato and mix well. Make the gas flame low and let it cook on simmer. I added dum by cover the top with a tight lids and sealing it with maida dough on the rim....for the dum effect. U can skip this too. I cooked the curry on dum for 30 mins on the lowest heat. Remove it from heat and set aside for 5 to 10 mins. remove the seal and garnish with fresh coriander.

This was amazingly tasty. I am glad I tried Dum aloo....do try it and leave me ur comments and experience.

Colorful "No cheese" Pasta Salad

Photobucket


How can anyone say no to something which looks awesomely delicious and so colorful. I can't. I love food thats colourful....maybe coz I am a fine artist.....color really attracts me even in food. So this was something we had for a dinner last week...along with a bowl of warming low fat tomato basil soup and some garlic bread. Here I am just sharing the recipe for the pasta salad.... will share the soup recipe later.

Ingredients :

Multi grain rotini pasta - 2 cups
Green bell pepper - 1
Red bell pepper - 1
Red onion - 1
Fresh Basil - 3 sprigs
Garlic - 4 cloves
Red chilli flakes - 2tsp
Black pepper - 1 tsp
Olives sliced - 1/2 cup (optional)
salt to taste
lemon juice - 1 tsp
Olive oil - 1 tsp

Method :

In a big pot keep water to boil. Add salt and little olive oil to it and keep it boiling.

Now, In a skillet take some oil and heat it well.Add the red chilli flakes and garlic and suate for few minutes. Add the veggies and stir fry on high flame. See that the veggies get cooked yet remain crisp. As these veggies can even be eaten raw u dont actually need to cook them but stir fry them well so that the flavour of the oil, garlic and chilli coats them well. Off the heat and add the basil leaves roughly torn by hand.

Simulataneously, Add the Pasta to the boiling water and cook till al dente. Drain the pasta and without rinsing transfer the hot pasta into a salad bowl. Add the cooked veggies into the pasta along with some salt , pepper and chopped olives. Mix well. Add some lemon juice on top if needed. My hubby loves lemon in everything so I added some lemon juice and some lemon rind to this... tasted awesome. Do try this Pasta Salad and let me know how it worked for u.

I opted to roast the veggies on stove top, but U can even pop them in the oven and 350 degress for 10 to 15 minutes and add this to the pasta...:)

Enjoy this wholesome goodness..:)

Tuesday, February 22, 2011

Chana Jor Garam


"Chana Jor garam..... Chana Jor garam babu main laya mazedaar Chana Jor garam..." Thats the song from the movie kranti... I know its not such a famous song but I remember it because its about my favourite munchy snack "Chana Jor Garam". If u have not seen the movie Kranti I would reccomend u to see it..not for the snack...:P. It is a good Desh bhakti movie with veteran actors and good acting..:)

Here is the song from Kranti for all to enjoy. The funny thing is I found another old song by Shamshad Begum and Kishore kumar...:) It was somewhat same lyrics as the newer one..:P Here is the old song.

In the newer song u can see Shatrughan Sinha and Hema Malini carrying small box kinda thing around there neck.... well thats how the chana vendors in Nagpur used to get it for selling Chana Jor Garam. He will call out loudly " Chana Jor Garam" in a very distinct tone. Ohh how I used to wait for him.... I don't remember if I ever even waited for "R" that way.... hehehe :P. Hope he is not seeing this..:P. My oly memory of having this was when I was in Nagpur. It seems, this street side snack is famous in Mumbai too but sadly I never went past the Bhelpuri n pani poori all the time I was in Mumbai :(

The street version of the chana Jor is deep fried and is very difficult to make.The chana has to be soaked, then dried, then fried and then later flattened into these mini discs. I went for the healthier and easier option "Haldiram's Chana Jor". It is ready made hence easy and baked hence healthy..:)

If any of u ever tried making this chana Jor at home do let me know how u managed doing it. Maybe seeing you I can give it a try. Anyways Once the Haldiram's packet it opened... this recipe is a child'd play.

Ingredients :

(recipe serves 4 or 2 very hungry people like us :d)

Haldiram's Chana Jor Garam - 1 packet
Onion - 1 small chopped

Tomato - 1 chopped

Juice of lemon - 2 tsp

Salt to taste (I used rock salt)

Red chilli powder - 1/2 tsp

Cilantro - 2 tbsp (finely chopped)

Raw Mango - 1/3 cup chopped (optional)

Method :

1) Take the chana chor in a microwave safe plate and MW for 45 seconds. I like the chanas to be a bit warm...:) This process is completely optional and doesnt make any difference to the taste of the chana. In a big mixing bowl combine all the ingredients (except salt n chili powder) and mix with a gently hand.

2) Taste the mixture for seasoning and add the salt and chilli powder accordingly.

3) The Haldiram chana chor has added salt in it... so its advisable to taste it before adding any salt. Serve in a Paper cone as I did....and relive the taste and streets of Mumbai / Nagpur :D

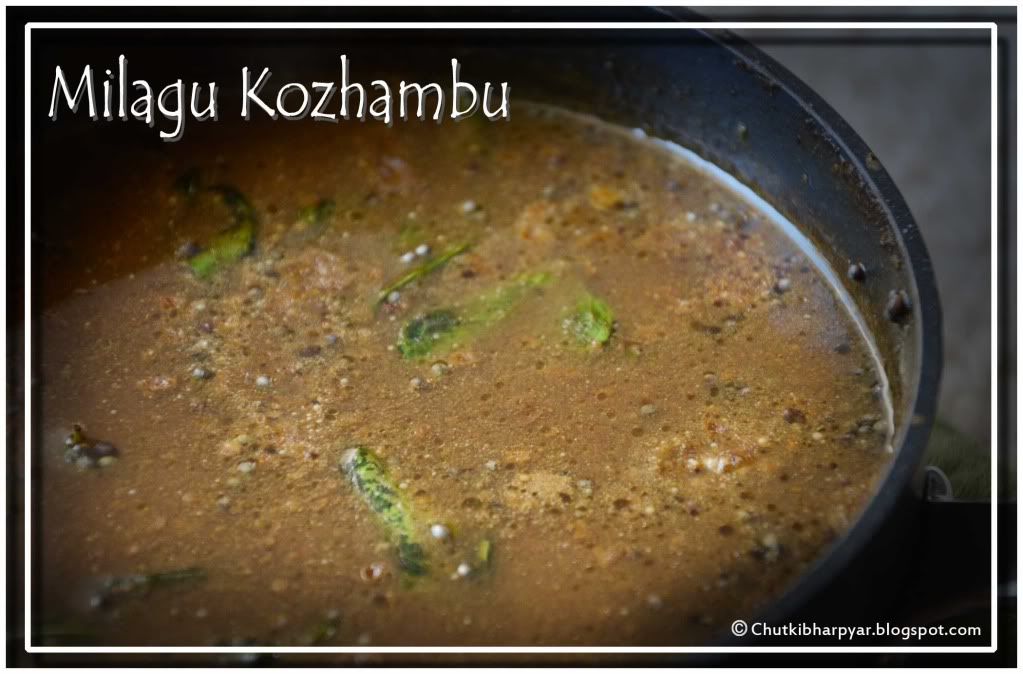
Milagu Kozhambu

The weather has been so bad for past 3 weeks here in Los Angeles. We r getting this unexpected rains and the temperature is dropping down day by day. As a result of all this me and "R" fell ill with cold, cough and congestion. I hate having cough. I can manage even fever and running nose.... but cough is something I cannot manage.

A sweet friend and Neighbour got me this Milagu kozhambu...(pepper gravy) which helped me to ease out and soothe my throat....and the taste was terrific..:). This was the only thing I had for 3 days in a row until my cough and cold was almost gone..(poor "R"..:P). Black pepper has very good medicinal values and is considered to be the best medicine for cold and flu. I followed the recipe from the Indian Vegetarian Kitchen blog. I just altered the pepper a bit (read increased First batch 2 tsp then second batch 1 1/2 tsp) as I felt like having more pepper. And the result was I literallly cried out all my mucous hehehhe...The second batch was better...:P. But I feel for "normal people" unlike me... the quantity given in the IVK blog is perfect...:).

Anyways here goes the recipe.

a) Ingredients :

Tamarind concentrate /pulp - 2 tsp mixed with 1/2 cup water
Sambar powder - 1/2 tsp (rasam powder will also do ;)..)
Asafoetida - a heavy pinch
Riceflour - 1 tsp
Powder jaggery - 1 tsp
Salt to taste
Mustard seeds - 1tsp
Curry leaves - few
Olive Oil - 1 tsp

b) For roasting and grinding :

Urad dhal - 2 tsp
Chana dhal - 2 tsp
Red chillies - 2
Whole black pepper - 1 tsp ( I added 1 1/2 as said earlier..)
Curry leaves - few leaves

Method :

1) Dry roast the above ingredients (b), cool and grind with little water to form a paste. Keep aside.
2) In a vessel add the prepared tamarind water along with salt, sambar powder, hing and 1 cup of water and bring it to a boil for 15 mins.
3) Now add the ground masala to this and mix well. Continue to boil for another 10 mins so that kozhambu becomes a bit thick. If not, add rice flour (mixed in 2 tsp water) to the mix to thicken it.
4) Mix in the jaggery and stir well to dissolve it. Let it boil for few more mins.
5) In another small pan add oil. when hot add the mustard seeds and curry leaves. Once the mustard seeds finish crackling add this tempering to the mixture and mix well.

Serve hot with steamed white rice and ghee. Delicious and heavenly when ur having a bad cold..:) Enjoy and take care :D
I am sending this recipe to the Boommarked recipe- Every Tuesday event for Aipi and Priya..:) sorry cudnt add the logo due to blooger glitch...:)

Friday, February 18, 2011

Tofu in Chilli garlic Sauce

I got this recipe from a friend in a common orkut community. I had to try this immidiately. Lucky for me I had all the ingredients needed for making this curry. So here it goes. Thanks Meena for sharing this super easy recipe with me..:)


Ingredients :

Firm Tofu - 1 pack
Baby corn - 1 can
Broccolli florets - 1 cup
Red onion - 1/2 cup sliced
Garlic - 12 pods (finely chopped)
Sesame oil /Olive oil - 1 tbsp
Red Chilli paste - 2 tbsp (I used Sambal Oelek)
Tomato Ketchup - 4 Tbsp
Vinegar - 1/2 tsp
Sugar - 1/2 tsp
Celery - 1 stick (finely sliced)
Green Capsicum - 1 (chopped in chunks)
Ching's all-in-one sauce - 1 Tbspn ( I used simple Soya Sauce)
Salt to taste
Cornflour - 1 tspn

Method :

1) Drain and wash tofu and cut into cubes. 2) Heat oil in a wok and stir fry the garlic for a minute or so. 3) Add celery, onion and spring onion and stir fry for 2 mins. 4) Add the Broccoli, capsicum and baby corn and stir fry well for another 3 mins.

5) Mix Cornflour in 1/2 cup of cold water and keep aside. 6) Mix salt, sugar, vinegar, Tomato ketchup, red chilli paste and ching's All-in-one in a cup and mix well for a minute.

7) Add tofu to the stir fried garlic and mix gently. 8) Add the conflour and spice mixture to the tofu along with a cup of water and stir. 9) Let it boil for 5 to 7 minutes and bring it down to a boil.

Serve along side fried rice or noodles and enjoy :)

Microwave Paal Gova

I used to love this sweet as a kid. It was my only favorite sweet. My mom used to make this often especially on diwalis. I used to enjoy eating cup full of these those days but now I can't afford it right? The only thing that comes to my mind is sugar, fat and calories hehehe. How people change as they grow. But still this is my favorite sweet and given a chance I can still eat cup fulls on this..:P yummm!

I remember my mama used to get this for me from the chennai Aavin counter in the station just before our train was ready to leave. I used to enjoy it all the way back to Nagpur. Yum!

Here is the easy to make recipe. Traditionally making this sweet takes lots of patience.When my mom used to make this earlier she used to take so much time making this. Taking milk in a kadhai and then cooking it in high flame until it reduces. Yumm! but so streneous. Thanks to the technology and new inventions:d

Ingredients :

Sweetened Condensed Milk - 1 tin
Yogurt - 1 tbsp
Ghee - 2 tsp

Method :

1) In a deep Microwave safe bowl add the ghee and melt it for 20 secs. 2) Now add the Condensed milk and yogurt and mix well and Microwave at high for 5 minutes. 3) Keep stirring every 1 minute until the condensed milk thickens but not dries up. 4) Alter the timing depending on the power of your microwave. Your delicious sweet is ready..:)

** U can use evaporated milk instead of condensed milk to alter the sugar that goes into ur sweet. look for unsweetened condensed milk if u can get it..:)

Enjoy this lovely piece of heaven...:)

Wednesday, February 16, 2011

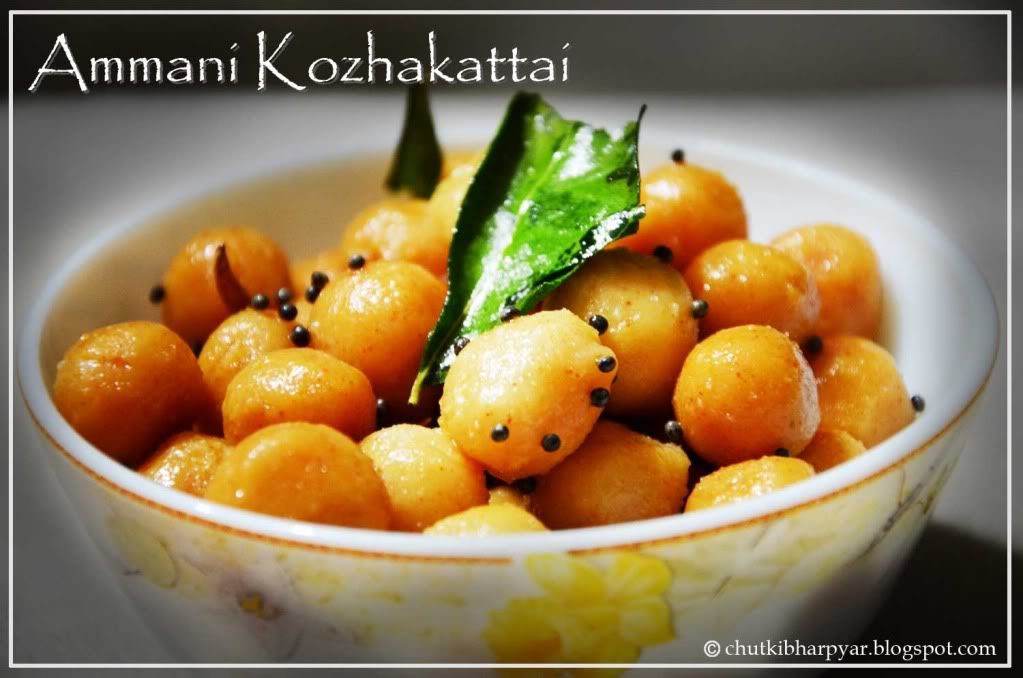
Ammani Kozhakattai


This is one of my favorite evening snack. I used to love this as a kid. Every Pillayar Chaturthi I used to wait for the poojas to get over so that I can enjoy these amazing Kozhakattais....:)

So here come the recipe for the heavenly kozhakattais..:)

Ingredients :

Rice flour - 1 cup

Red chilli powder - 3 tsp

Hing - 1/4 tsp

Salt to taste

Oil - 1 tbsp + 1 tsp

Warm water - 1/2 cup

Mustard seeds - 1 tsp

Curry leaves - few

Red chilli - 3

Method :

In a bowl mix all the ingredients together into a soft pliable dough. make small marble size balls of the dough. Steam the balls in a pressure cooker.

In another small pan take some oil and heat it well. Add the mustard seeds, curry leaves and the red chiili. Let it brown a bit and then add it to the steamed kozhakattai.

Enjoy this easy to make simple snack...:)

Thursday, February 10, 2011

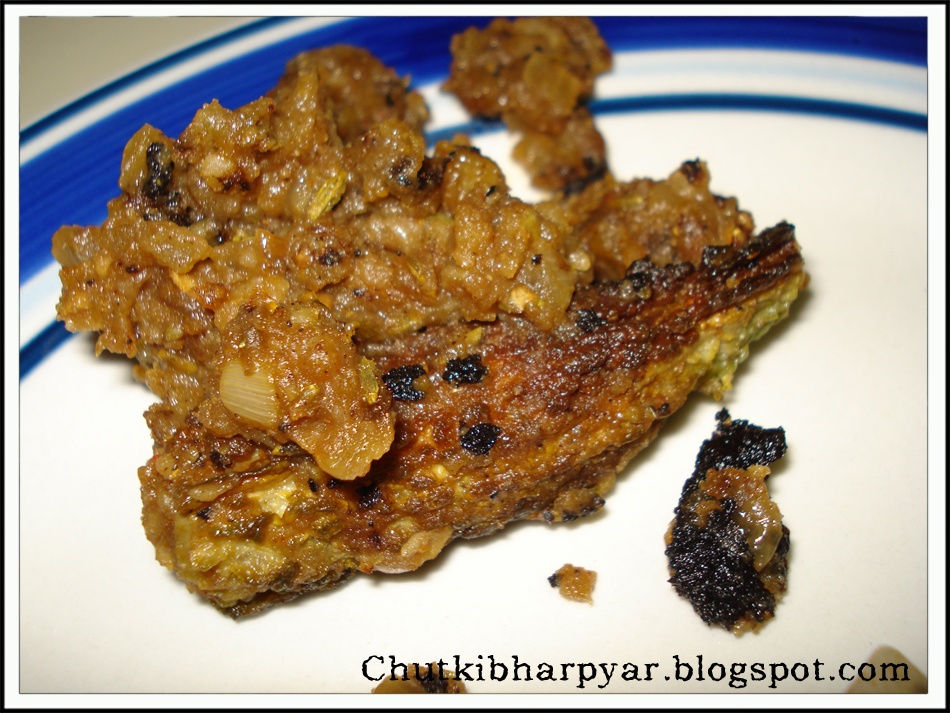
Khatta Meetha Stuffed Karela


I hate Karelas..... yes literally hate. But this one recipe was something which I love....inspite of it being made with karela.... The best part is... u cannot taste the bitterness atall..:)

I got this Idea from a college friend who used to get these in her dabba. I never bothered to taste it then because it was karela, but now when I think and see how much nutrients r there in karela.. we (me n R) r trying to get it into our food list..:) As we both hate it, I had to try some recipe which will make it easier for us to try it..:P


Hence came this recipe of Khatta meetha Karela...:)


Ingredients :


Karela / bitter gourd - 6 (ends cut , slit length wise and scooped out )
Onion - 1/2 cup finely chopped
Tomato - 1 1/2 cup finely choped
Ginger n garlic - 1 tsp finely chopped
Potato - 4 big boiled
Tamarind pulp - 1 bsp
Jaggery - 1 lemon size piece or 2 to 3 tbsp (depending on how sweet the jaggery is )
Salt to taste
Chaat masala - 1 tsp
Red chilli powder- 1tsp
Garama Masala - 1/2 tsp
Amchoor powder - 2 tsp
Turmeric powder - 1/4 tsp
Cumin coriander powder - 1 tsp
Oil - few tsps


Method :


1) Clean the karela and wash it under running water. Sprinkle about 1 to 1 1/2 tsp salt on the karelas and keep aside for 2-3 hrs. The karela will leave water.
2) Drain that water and rinse each karela well under running water. I dont like the bitter taste at all in the karela....atleast for my first try with it. This process will remove most of the bitterness from the karela..:) U can skip this if ur okie with the bitterness :d


3) Now for the filling. In a pan take some oil and add the ginger garlic paste. fry for 2 minutes and add the chopped onions.
4) When the onions r tender n pink add the tomato along with the red chilli powder, garam masala, turmeric powder, chaat masala and coriander cumin powder. Mix well and let the tomato cook well and become pasty.

5) Now add the mashed potato and mix well. Let all the spices mix well into the Potato. Add salt to taste and amchoor powder. Remember u have salt in the karelas too so be careful not to over salt ur filling.


6) Add 1/4 cup of water to the tamrind pulp and mix well. Dissolve the jaggery in the tamarind juice and mix well. I used powdered jaggery which was easy to dissolve..:)
7) pour this mixture over ur filling and give a final stir. Mix well and ur filling is ready now..:)
taste it and add more amchoor or red chilli powder as needed.


8) Now comes the assembly and cooking. Stuff this filling inside the slit karelas. If ur karelas r sleek they will hold the filling well. Mine weren't holding the filling so I tied it with a thin thread. This helped the filling from not coming out when cooking.


9) Now u can either steam this in a pressure cooker or shallow fry it in a pan or Tava. I went for the option 2. Fry the karela till its crisp and dark brown spot appear on it..:) Your Khattha Meetha Karela is ready to be savoured..:D

10) If u have any leftover filling add it to a pan and pour 1/3 cup of water to it. make it like a gravy and add the fried karelas to it. It will become Bharva karela curry :D.


Enjoy it the way u want..:d. We loved it :)