WELCOME!


Powered by IP2Location.com
Showing posts with label bakes. Show all posts

Tuesday, August 11, 2009

Vegan Chocolate Cake

Vegan chocolate cake for a dear friend. My dear childhood friend Krithika visited me here in US for the first time and that too with her new born baby girl. The day she was going to come to my house was her birthday..:) I wanted to make something special for her....and wts better than a sweet treat. As she was coming with her mom, and granny I wanted to make something eggless.

I found this awesome Vegan chocolate cake recipe in Madhuram's blog and I was so glad. This recipe is so simple to make and can be made with the ingredients readily available at home. Cool isnt it? Here is the actual recipe. I will list down the recipe and the small changes I made in it. The icing is not vegan. I used ready made buttercream frosting and I didnt have much time I just sprinkled some colourful ice cream sprinkles on it...:P easy way to decorate :)

Ingredients :

All purpose flour - 1 1/2 cups

Sugar - 1 cup

Salt - 1/2 tsp

Baking Soda - 1 tsp

Unsweetened Cocoa powder - 1/4 cup

Vanila extract - 2 tsp

Canola Oil - 1/3 cup

Distilled Vinegar - 1 tbsp

Cold water - 1 cup


Method :

Preheat the oven at 375 degree F.

In a bowl mix all the dry ingredients (flour, sugar, salt, baking soda and cocoa powder) together. Keep aside.

In another bowl take the water and mix in all the wet ingredients to it (oil, vinegar, vanila extract). Whisk well. Add this mixture to the dry ingredients and mix well using a hand blender. Blend till a nice smooth batter is formed.

Grease a cake pan with some butter (I used wiltons cake release. Its very very good, and the cake out out so well.) Pour in this mixture into the pan and even it out. Bake in the preheated oven for 25-30 minutes or until a tooth pick outs out clean. Off the oven and leave the cake in for 5 more minutes. Dont try to remove the cake from the pan now. The cake will break / crack. Let the cake cool well in the room temperature. Leave it for an hour or so.

Run a knife along the edge of the cake to remove it from pan. turn it upside down on a plate of serving tray and pat the bottom of the pan to loosen the cake.

Now u can serve the cake hot as it is with tea or coffee.

To frost the cake, let the cake cool completely. I left it out for another hour and Sliced it into 2 layers, then wrapped it with a plastic wrap and kept it in the freezer for 1 hour. Keeping it in the freezer helps the frosting to stay on the cake well. U can slice the cake into 2 layers if u want to frost in the centre.

Once the cake is cool. I frosted it with store bought buttercream icing and decorated with ice cream sprinkles..:) My friend loved it and I was so happy to see the smile on her face.

HAPPY BIRTHDAY KRITHIKA :)

Tuesday, July 21, 2009

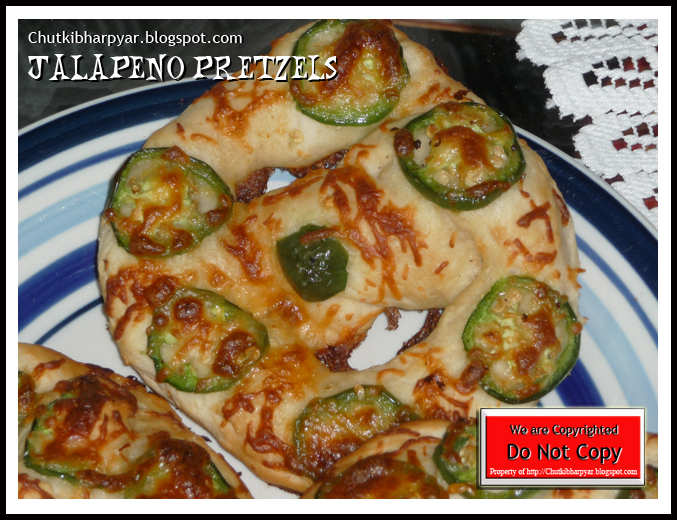
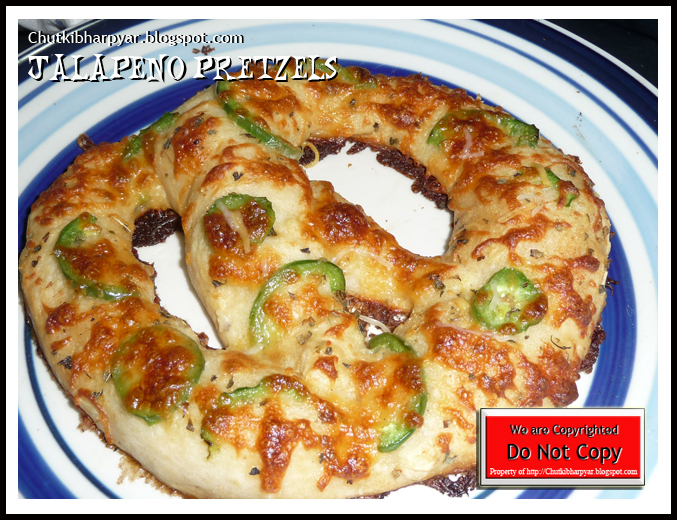
Jalapeno Pretzels - Baked


Who doesnt love pretzels and specially if its an Jalapeno Pretzels.... hehhe I can see all the spicy food eaters shaking their heads along with me. I was first introduced to this pizza with handle at Wetzel's Pretzel here in Los angeles. I normally cant eat jalapenos much, but when it comes to this I can keep hogging with tears running down my cheeks yet wont stop :P...hehhee. I instantly fell in love with it. From then, whenever I go for shopping I make a point to grab one of these. Its so filling and tastes so good.

I found out recently that not just Wetzel's Pretzels but almost all the pretzel centres in USA have these Jalapeno pretzels. I recently had one in Aunt Annie's. It was not as good as Wetzel's but yeah, it was Jalapenos okie :P

Did u know that soft baked pretzels r very very famous in Pennsylvania. U can find it in almost all stores and mall there? Well I didnt know but I remember seeing that in some show. Anyways now u wants to know about the origin right? Lets talk about this recipe... I combined the procedure and ingredients from 2-3 sites to get my own pretzel recipe. I got a bit confused with the yeast quantity..( I didnt see the amount of water I have to use to mix the yeast....hmmm :( and ended up with a watery dough... and then again ended up adding more flour and yeast hehhe) hence I didnt get the perfect knot on the pretzel and it looks all merged up :P

Well did u know that the calorie content in an Aunt Annie's pretzel is 310 and its very high in sodium? Thats coz they r normally fried. Hmmm yeah seeing that I felt y not trying making our favourite at home, thats way I know what I am putting into it... good or bad ;) So here is my recipe. I have used All purpose flour for this recipe... But u can make it even with wheat flour for making it more healthy...:D


Wooo can u see the baked Jalapenos on that one.... I am sure that will make u drool over this one :) Isnt it??

I somehow dont like plain pretzels. I need the cheese and the butter grease on it for me to appreciate its genuine quality... hehehhe:P Anyways here goes my recipe. I took some tips from Divya's Dil-se blog too. Thanks Divya.

Ingredients :

Active dry Yeast - 2 1/4 tsp
All pupose flour - 3 cups
(If using Wheat flour - 4 cups )
Sugar - 1 tsp +1 tsp = 2 tsp
Luke warm water (for yeast) - 1/2 cup
Salt - 1 tsp
Olive oil - 1 tbsp
Baking Soda - 1 tsp

Options for caramalising the pretzel..

Milk - 1/2 cup
or
Baking soda - 2 1/3 tsp &
Hot water - 1 1/2 cup
0r
Eggyolk - 1
and 1 tbsp of water
Or
Maybe some sugar solution (check the video to understand about these toppings :D)

Other toppings:

Butter - 1 tbsp
Cheddar cheese - 1 cup
Jalapeno thinly sliced - 1/2 cup
Garlic powder (optionla)
Kosher salt


Method :

In a measuring cup take 1/2 cup like warm water and add 1 tsp sugar and yeast to it and mix well. Keep aside till the yeast froths well.

In another bowl add all the dry ingredients like the flour, salt, sugar and mix well. Slowly add the yeast mixture and knead the dough for 8-9 minutes. The dough will be elastic which is okie...:) Mix well until smooth :). Add a tsp of olive oil on the dough and mix well so that the oil coats the dough well and that the dough doesnt stick to the bowl. U can even use a fresh greased bowl instead...Cover with a cling wrap and keep aside for 1 hour or so.

Preheat the oven at 450 degree F.

After 1 hour u can see that ur dough has doubled in size. Now make small tennis ball size rounds and keep aside. It will make around 11 balls. Take each ball and roll it into a long medium thickness thread and twist to form the famous pretzel shape. You can either form a knot or else u can place the ends across on each side...:) You can refer to this site for tricks for this step. You can check this video to know more about shaping the pretzels and making the colour nice and golden brown :D

Now that ur pretzels r shaped now comes the turn for the topping. Before we start with the topping we have to think how we r going to make out topping stay on oyr pretzels and also how to get that caramalised brown colour on our pretzels.

Commercially they use a product called lye which is very corrusive and as we r trying to making something healthy (before than store bought stuff) we dont wanna handle anything that damages our tissues right? So what else can we use. I have given different options in the ingredients and also the video that I shared tells u in detail what all can u use. For this recipe I have used Baking soda alone. we can combine it wil Egg yolks to make it more golden. I skipped it...:)

In a bowl take nice hot boiling water. Add baking soda to it and mix well with a spoon. Add the shaped pretzel in the water and leave it for like 30-40 seconds. Leaving it for this much time is important orelse ur pretzels wont get that golden colour...:) Take it out and place it on a lined cookie tray. Use lined tray to make it low cal... greasing is no way better right?

Now garnish ur pretzels with some kosher salt, sliced jalapenos and top it with some cheddar cheese as garnish. U can add garlic powder if u wish. Now ur pretzels r ready to be baked. Put them in the oven for 8-10 minutes. Once the pretzels become golden on top u can take them out and serve hot...:)

Hope u enjoy these pretzels.

I have tried to share as much information possible so that u can enjoy these lovely pizza with handles at home...:) Do leave ur comments and suggestions :D
Enjoy!

Wednesday, April 22, 2009

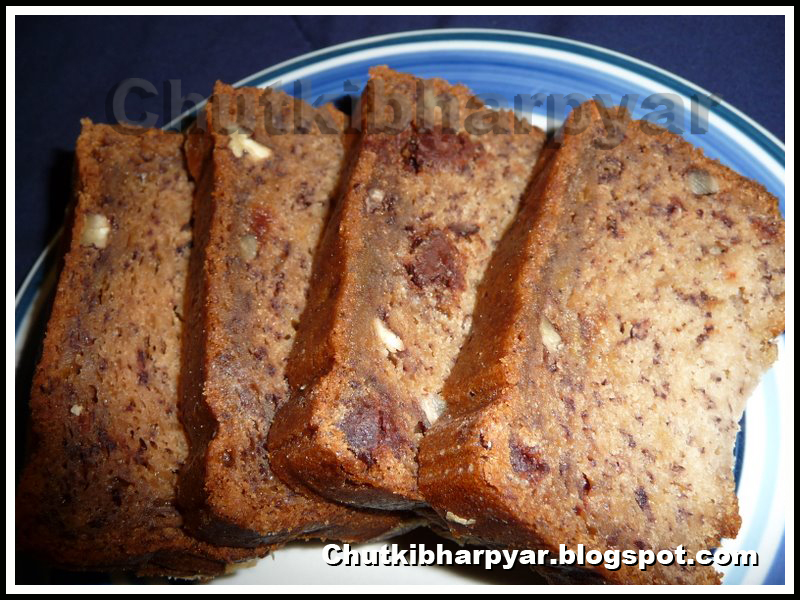
Nutty Banana Bread


Yummy yummy yummy... This is the first time I ever tried making banana bread and I am just loving it. One of my friends in orkut shared this amazing recipe with me...And as I had so many overripened bananas wts better than baking a banana bread? So here it goes.

I made this recipe using all purpose flour but i wud suggest u to use wheat flour as it enhances the taste.:)

Ingredients:

1 cup White Sugar

1/2 cup unsalted butter (U can even use oil instead of butter)

2 Eggs

11/2 cup All Purpose Flour (or wheat flour)

1 tsp. Vanilla Extract

4tbsp Buttermilk

1tsp Baking Soda

3 Mashed Bananas

1 cup Chopped Nuts (walnut) U can add any other nuts u want...(I added prunes and chocolate chips to the bread batter)

1 pinch Salt

I made changes in this recipe when i made my next bread well anyways that a different recipe all together...:P

Method :

Pre-heat oven at 350 degree Fahrenheit (175 degree Celsius).

Take a nice metal bread loaf pan...or u can even use the foil loaf pans that u get in market.

Grease and flour the cake pan. How to do this? Well just apply cold butter to the insides of ur pan. Put 1 tbsp of flour inside the pan. Now cover the pan with a cling wrap and then shake it well so that the flour coats on all sides of the pan. This is an easy and mess free way to do this.

Next, In small bowl sift together flour, baking soda and salt.

Separate the egg whites and the yolks and keep aside.

Mash the bananas in a seperate bowl.Keep aside.

In a big mixing bowl cream butter and sugar together. Now add the egg yolks and vanilla extract and beat well.

Now mix in the mashed bananas. next add the flour mixture alternately with the buttermilk to the creamed mixture. Mix with light hand only to combine, and not too much. Stir in the nuts.( In my case the assorted nuts and the chocolate chips...:)...)

In another bowl beat the egg whites until stiff. See that u dont beat too.Fold the egg whites in the batter and mix well with light hands. Pour the batter into the greased pans. Decorate with banana slices or nuts...:)

Bake at 350-degree Fahrenheit for 30 minutes or until a toothpick comes out clean. Remove from oven and cool it. Cut into slices and serve hot along with ur coffee and tea.


Amazing Isnt it?? Do try this recipe and let me know ur views...:D


Wednesday, April 8, 2009

Red Velvet cake - Happy Baby shower..!


Babies......Babies.......Babies Galore!

Booties and rattle, diapers and swing.....

"Here comes the Baby!" comeon lets Sing!...

Wow I just now discovered I am a poet hehhe... wrote that rhyme in a click. Hmm anyways babies r something that inspire u to do so many things...write poetrys, be responsible and even change ur whole lifestyle.

One of my good friends here in Los Angeles is pregnant and I am so so happy for her. She is the first friend I made in US... and its a friendship to cherish. Seeing her I can understand that babies r such a big big commitment. All the things they had to prepare for the arrival of the little one. Buying the stroller, car seat, crib and then other small small stuff and then setting it up too. It was such a wonder to see them being so passionate about these things...:) I guess the babies make us grow up,........... grow up from our young happy go lucky age to become more resposible and mature...:). This somehow reminds me how we used to set up the whole house and the aasan for lord Ganesha's arrival...? this is somewhat the same isnt it?? hehehe...Now as the time is near and the wait is almost over... we all wish she has a safe and easy delivery. She has already passed her due date and the baby is expected anytime...:) Friends do pray for my lovely friends. It is their first baby. Pray she has a safe delivery and the baby and mom both be healthy..:)


This cake is something I made for both of them. For wishing them luck..:) They had a baby shower at their place which was completely arranged by both of them with rituals and all.It was amazing and sooo beautiful arranged...:) As it was her baby shower and they both were the ones who were running around planning things.... I wanted to make something special for them and wish them luck for the arrival of the little on...

So here it is my first special cake from scratch...:) and this is also my almost first experience with icing and fondant...:) but I enjoyed it sooooo much and I am sure I will be doing it again. ofcourse my friend Hetal (Isha of Isha's kitchen ) did help me making this one...and also making the fondant deco... even thought being her first time even seeing fondant...:) Thank u Hetal... we do make a great pair...:D


Cute isnt it? My experience with fondant was good..:) I was kind of blank first about how to design the top of the cake... I have never done icing before this...(using the tip and buttercream and all....never done that) I have worked with fondant earlier....(Once I made a bow on top of the cake using fondant...:) and this is the second time I am working with it... It was so nice.. specially making the baby and the baby stuff...:) it felt so nice and so cute. I am sure u will agree with that Hetal...:) isnt it?

Making the baby was the most fun... the hair and the pacifier of the baby was fun too.. though I wasnt sure that looks like a pacifier hehhe. My DH helps me and guided me on the shapes of the baby stuff.Over all it was a great experience and I am sure I am gonna try this fondant work again.:)


Anyways now going to the recipe of this cake. I ate this cake once in CPK when we went for Valentine's day and wanted to try it. So when I saw this recipe in Joy of baking site... I jumped and wanted to try it immidiately. So here goes the recipe of this yummy delicious soft and creamy cake....I am sure you will love this one.. as much as we all do..:D To make this cake you need...

Ingredients :

2 1/2 cups sifted cake flour
1/2 tsp salt
2 tbsp Dutch-processed cocoa powder (I used hershey's)
1/2 cup unsalted butter, at room temperature
1 1/2 cups Granulated Sugar
2 large eggs
1 tsp pure Vanilla extract
1 cup buttermilk
2 tbsp liquid red food coloring ( I also used the indian powdered food colour...:) alongside)
1 tsp white distilled vinegar
1 tsp baking soda

For the Cream Cheese Frosting: (this frosting is what give major flavour to this cake.)

1 1/2 cups heavy whipping cream
8 oz cream cheese, room temperature (1 packs philadelphia creamcheese will do)
8 oz tub of Mascarpone cheese, room temperature (As i didnt get mascarpone cheese, I used Cream cheese here too..)
3/4 tsp pure vanilla extract
1 cup confectioners' (icing or powdered) sugar
2 cups dessicated sweetened coconut for garnishing


Method:

Preheat the oven to 350 degree F.
Grease two 9" round cake pan. I used the Witon Cake release and it worked like magic for me.You can even line them with parchment sheet for easy or no clean work. Set aside.
In a mixing bowl sift together cake flour, salt and cocoa powder. Set aside.
In a bowl beat the butter, using a hand mixer till smooth for about 1-2 minutes. Add the sugar and beat again until light and fluffy. Add the eggs one by one, beating in between. Scrape the sides of the bowl and then go ahead and add the vanilla essence. Beat well until everything combines well.
In a measuring cup whisk together the buttermilk and the red food colour. Adding buttemilk to the cake gives it a moist and tender crumb. Buttermilk has a nice thick creamy texture with a rich tangy buttery taste that makes baked goods tender and soft. While keeping the mixer on a low speed alternately keep adding the flour and the buttermilk mixture in 3 additions, begining and ending with the flour. Mix well.
In a small cup mix the baking soda with the vinegar. Allow the mixture to fizz and bit and then quickly fold it into the cake batter and mix well.
Now u have to be quick and divide the batter into the two greased pans. Smooth the tops of the batter with a spatula or spoon. Bake in the preheated oven for Aprroximately 25-30 minutes or until the toothpick inserted in the cake comes out clean..( mine cooked in approx 25 minutes.) See that u dont over cook the cake orelse the sides will burn and become hard. Once the cake is nicely baked...take it out of the oven and let it cool in the pan on the cake / wire rack for 10 minutes. Invert the cake on the cake rack and let it cool till room temperature. Once its a bit cool place it in the freezer for atleast an hour or so (this is done to make filling and frosting the cakes easier.)
In the meantime prepare your cream cheese frosting for the cake. In a bowl, using a hand mixer process the cream cheese and the mascarpone cheese ( I used cream cheese instead and its didnt make any difference to the taste..) until smooth. Add the Vanilla extract and confectioner's sugar and beat well. (Be sure u use confectioner's sugar...I used granulated sugar by mistake and my frosting ended up being a bit drippy...:P I did manage to correct it... but please dont do that mistake and be careful..what sugar ur adding..)
In another bowl take some whipping cream and beat it well till stiff peaks are formed.Now quickly but gently fold in some of the whipped cream into the cream cheese to make it light.Beat gently.You can actually feel the cream cheese frosting becoming light and fluffy. Add the remaining whipped cream in 2 seperate additions ,beaten well in between. If the frosting is not thick enough to spread, cover it and place it in the freezer for an hour or until it is thick enough to spread.
Now moving to the assembly of the cake...
To assemble cut each layer of the cake horizontally with the serrated knife. I used the levelling tool from wilton.Did made my job so much easier. Check their Cake levelling tutorial here.
You will now have 4 cake layers, top of the cake facing down on ur serving plate or cake circle.
Spread the bottom most layer with some frosting.Cover it completely. Place another layer of the cake on top of the frosting and continue covering it with more frosting. Do the same with the rest of the cake layers. Once all the layers r done. Frost the top and sides of the cake with the frosting. Once u have put one coat of the frosting, keep the cake in the freezer again for 1/2 and hour. Now, take the cake out and frost it again with the left over frosting and then top it with some dessicated sweetened coconut. See that the coconut covers the top as well the sides of the cake. Now ur cake is ready to be eaten..:)
Or u can just go ahead and decorate it using fondant or icing...:) for a special occassion like the one I made this cake for...:)
Our dear and lovely friends...:)
When my friend saw this cake she was surprised and the look on her face was enough. it paid off all the effort we took to make this cake. Love u neha... hope u have a safe and easy delivery. just want to let u know that we all r eagerly waiting for the little one...:) as much u both are..:D god bless you.! Hope u all wish her the same...:)
God bless the mommy and Daddy-to-be...:)

Sunday, March 29, 2009

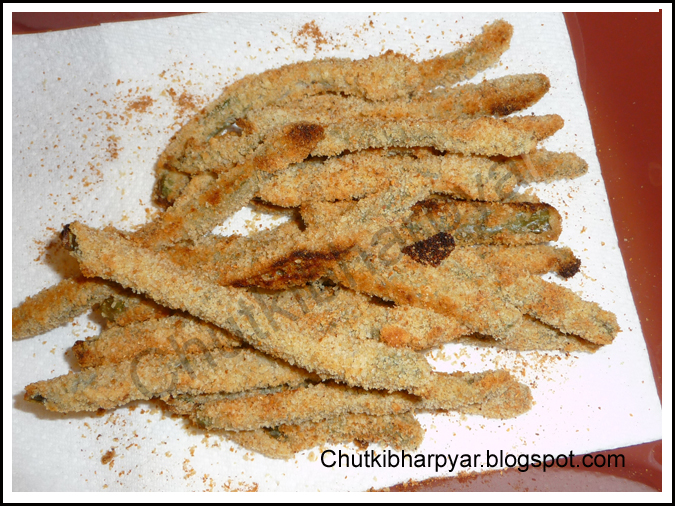
Baked Bean Crisps


I had deep fried French beans crisps at P.F Chang restaurant a few months back. I really liked it so much that I wanted to try it at home. Just made some modifications. I baked these crisps instead of deep frying them. It makes a great evening snacks...:) Hope u enjoy eating this as much we did. What great way to eat the healthy beans? the healthy way ofcourse...:) and this is it.....:P

Ingredients:

French beans - 1/2 pound

Thick Yoghurt - 1 1/4 cups

Sour cream - 1/3 cup (optional)

Salt to taste

Cheddar cheese - 1/2 cup (optional)

Pepper - 1 tsp (add to taste)

Lemon extract - 2 tsp

Cayenne pepper / Red chilli powder - 1/2 tsp

Dried Oregano - 2 tsp

Bread crumbs - 4 cups

Oil spray

Method:

Preheat the oven to 375 degrees F.

Clean and cut the ends of the french beans. Steam the beans in a cooker or in the microwave till tender and well cooked. Keep aside to cool.

In a big mixing bowl add the Yoghurt and beat it well, until smooth and creamy. Mix in the sourcream. This just adds the tartness to the batter. You can skip it too and instead add some extra lemon extract..but caution! this will make the batter very watery....:)

Now add the grated cheddar cheese and mix well. Add all the other spices (except bred crumbs ) and mix it well until smooth and thick. (this mixture tastes great as a dip too...:P yummmmm!)

In a plate spread the bread crumbs.

Coat the steamed beans with the yoghurt mix and then roll in the bread crumbs. Place them in a cookie tray (baking tray) one by one. Spray the oil spray over the beans and bake them in the preheated oven for 20 to 25 mins or until the beans becomes lightly brown on top..

Your Bean Crisps are ready to be served...:) Serve hot with tomato ketchup.

Thursday, March 12, 2009

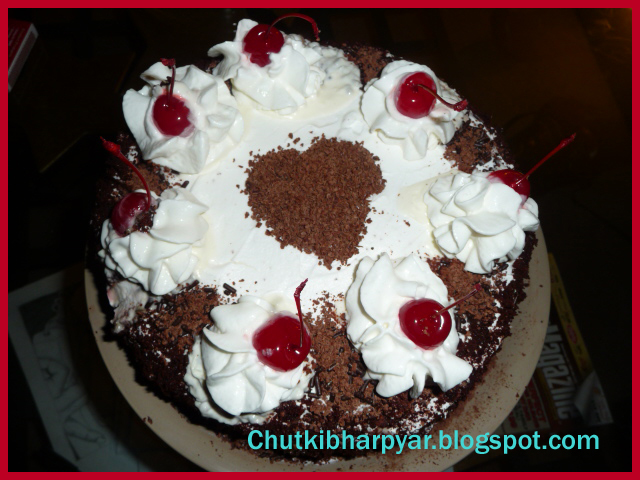
Easy Black Forest Cake

Yum yum Black Forest cake. This cake has always been my favourite. I remember eating in monginis...with every extra Rs. 10 that we used to save. This pastry has always been my fav and the same with my hubby. So what better ocassion to make this than for our anniversary..:D I made this one for our 2nd wedding anniversary which was on 8th of december (sorry for posting it sooo late..:d)

I wanted to make it special and had no idea what shud I make. So I took the help of my dessert Queen friend Jeana and ask her to help me out with any of her good recipes. She told me about this one as said that it will be easy too as its made using a mix. The minute I saw the cake I knew I had to try it out. And here I am with the outcome. The beautiful, soft and creamy Black forest cake. Yummm!

You can find Jeana's recipe here. I will anyways write down the recipe and procedure again here.

For making this awesomely easy and tasty cake u need....


Ingredients:

Devil's food cake mix (any brand) - 1 pack
Below ingredients as given on the cake mix...
Eggs - 3 (I used 2 and came out good)
vegetable oil - as on package
Water - as on package

Lite cherry pie filling - 1 can (I used normal cherry pie filling)
Whipped cream - 1 tub (u can find this in the frozen section)
Maraschino Cherries with stem - 7-8
Grated Chocolate -for garnishing


Method :

Preheat the oven to the required temperature to bake the cake. See the temperature Instructions on the cake pack. Mix the ingredients of the cake as given on the package.

Grease a cake pan well (or u can even line in with a parchment sheet.) The Divided the cake batter into two 8' round pans and baked it for 50 minutes. The time may vary from oven to oven so do check ur cake by inserting a toothpick into the centre of the cake. If it comes out clean, ur cake is cooked well. You can even bake the whole cake in one deep 8' pan and then cut it into 2 layers.

Let the cake cool well on a cake rack. Cut the done and the hard sides of the cake and keep it aside.

Open the can of the cherry pie filling and reserve the juice. Sprinkle some cherry reserve juice on both the cakes. Leave it aside for 15 minutes or so. See that u dont make the cake too soggy.

On a cake board, or cake circles (u can get these in Micheals..:D) take one layer of the cake and pipe a dam of whipped cream around the rim of the cake layer so that the filling does on escape to the outer surface.Now scoop out and spread the cherry pie filling in the centre of the cream dam. Spread well and evenly.

Now, place the second cake layer on top of the cream filling. Frost the sides and top of the cake with the whipped cream. Smooth it as fine and smooth as possible. Now remeber the cake dome and side scrapping of the cake...? Crumble that with ur hand and then stick them to the sides of the cake. Try to stick them to the sides as evenly as possible.

Now comes decorating the cake... You can do it anyways u want... play with the placement of the cream swirls and the cherries. I followed what Jeana had done with her cake. Playing safe..:P
Using the whipped cream in piping bags, make 7 swirls at equal intervals on the top of the cake.
Top the swirls with the stemed cherry, one on each swirl. Decorate the centre with grated chocolate.

*****One small tip. Dont use the canned cream or reddiwhip to make the swirls. They dont last long. I made the swirls on this cake, placed the cherries on top and went for a romantic dinner with hubby and when I came back I cudnt see the swirl anymore just cherry which where actually slipping down the cake. Hmmm thought it was a disaster but somehow managed to tidy it up a bit and get it back. So avoid the canned ones...used whipped cream from the tub.. they stay good..:) Enjoy making this Cake as much as I did..:D


This was our lovely anniversary evening cake. I had fun making this as it didnt eat up my time...:) I am glad i made this sweettreat and I am sure I will be making it again too.:)

Tuesday, April 29, 2008

Little hearts Biscuit or Palmiers?? - from Dhivya's Kitchen to Mine..!


Palmiers - Flaky and crunchy, sweet as well salty. When I saw this recipe in Dhivya's blog...it instatntly reminded me of the little hearts biscuits I used to relish on in india. Britania Little heart biscuits. These cute heart biscuits resemble them so much.

I was so happy to see this recipe that I immidiately wanted to try it out. I made this that evening itself and the result was outstanding. It tasted a bit different from the little heart biscuits... but it looked so nice and same...:) Thank u Dhivya for sharing this amazing recipe.

What are palmiers? Palmiers are traditionally frech pastries. A lot of people call these Elephant Ears, but in the European baking world they will always be known as Palmiers.Palmier (pal-mee-ay) is the French word for a palm tree and these cookies are said to resemble palm leaf.Light, buttery, cripsy, sweet french cookie. Takes a little effort the first time through but it's rather fast when you get the hang of it and it looks like you spent forever on them.

I always feel they look like hearts more than palm leaves...... checked out few more snaps of internet, they all look more like hearts.... hmmmm duno y they named it palm leaves... hmm..

Anyways, I made a few changes to the recipe....specially in the timings, and to enhance the flavour in my second batch of these biscuits. You can find the Original recipe from dhivya's blog here. Here goes my recipe with few changes.

You need :

Puff pastry sheets - 1 packet

Powdered Sugar - 3/4 cup

Salt - 2 tsp

Cardamom powder - 1 tbsp

Almond powder - 1 tbsp

Method:

Thaw the pastry sheets in room temperature. Dont microwave it.. I did that mistake so I am warning u. When I tried to defrost the sheets in microwave the edges became soggy....and it was difficult to handle it. So avoid thawing in microwave. Its better to keep it out before hand and allow it to thaw in room temperature.

Keep 1/4 of the total sugar aside and mix the rest of the sugar, cardamom powder and nut powder together. This powder should be fine. Keep it aside.

Dust the kitchen surface with the some sugar powder that we kept aside. Now unfold one of the 2 pastry sheet and dust the inside with some sugar powder. Now sprinkle the nut, sugar and cardamom powder over the sheet and gently press using a rolling pin to press the sugar in completely. Reapeat the same procedure from the other side too.

Fold in the 2 horizontal edges of the pastry to the centre of the pastry...from either sides.Dust with sugar and nut powder and press with a rolling pin. So see the steps with pictures see here. Again take in the folded horizontal edges and get them to the centre. Dust with sugar,nut and cardamom powder and press with a rolling pin. Now once again for the last step... fold the pastry sheet from the middle as in both the horizontal edges meet. Be gently...dont press too hard. Once ur roll is ready. Trim the edges keep aside (u can bake these too). Cut the roll in pieces, sprinkle sugar and nut powder over the pieces and place them in a cookie sheet. Keep about 2 inch space between the cookies. These take in lot of space when they bake. Keep it in the refridgerator for 15 minutes or so allwoing it to set a bit.

Now, bake the cookies @ 350 degree F in a preheated oven for around 10 minutes. Keep checking in between as these cookies become brown too soon. You dont wanna burn your cookies. So, one they become golden brown in colour, take them out. You can be assured they r done.

When I baked in my first batch I covered the cookie sheet with an aluminium foil, hence it took the cookie a lot of time to bake. So if ur baking ur cookie in an aluminium foil sheet, Adjust the time accordingly.When i baked in a foil, it took me nearly 20 minutes for the cookies to become golden brown. Guess its all trial and error. The best way is to keep checking the pastry in between to assure that its not burnt.

Your cookies are ready. Serve at room temperature. Tastes amazing and crisp when served hot. Enjoy.

Serve these crispy golden beauties with a cup of coffee... for those evening snacks. I am sure you will love it. :)... ENJOY!


Wednesday, April 16, 2008

Mushroom curry puff

Curry puff / Vegetable puff is something you will find in every Iyer bakery or small bakery in India. How I used to love them. Every time I went to Monginis I never used to leave the store without a curry puff or egg puff stuffed in mouth.I was so happy to hear some similar stories from my hubby "R'" after marriage. R is crazy about curry puff and I was so happy to know that he made them once here in US for some potluck party. Hearing this my craving for the puff started and I wanted to try it then and there......He did tell me the method in a brief way...or rather confusing manner.....that I prefered to depend on the internet than on my hubby for the recipe......u know how a bachelor would cook something specially during his school days...here in US...(I am really not trying to accuse all those bachelors who cook sooo well. kudos to u guys..:D.)

I had never used the puff pastry sheets and had no idea how they looked or how I have to work with them......So still confused and craving for the curry puff I kept searching for the perfect recipe... and i stumbled up on this one here...http://sailurecipes.blogspot.com/2008/03/curry-puff.html

Sailu has shown the method of making the curry puff so well that it cleared all my dilemas...:D

I made the masala bhaji on my own with my own ingredients... but u can check the link above for detailed step by step pics...:D

So here goes the recipe :d

You need :

Puff Pastry sheets - 1 pack (u have 2 sheets in these)

Potatoes - 2 diced and boiled

Peas - 1 cup

Mushrooms - 5-6 finely chopped

Red chilli powder - 2 tsp

Garam masala - 2 tsp
Ginger Garlic paste - 2 tsp
Jeera (cumin seeds) - 1tsp

Salt to taste

Oil

Fresh Coriander leaves

Method :

Keep the puff pastry sheet out of the freeze to thaw. Also in the meantine, preheat the oven to 400 degree F .

In the meantime prepare your bhaji for the puff. Take a big pan and pour some oil in it.Heat the oil and add in the cumin seeds and let it splutter. Add the peas to it. Let the peas cook a bit and become soft. I used frozen peas, so it didnt take much time to cook. Now add in the Potatoes and saute well till the potaotes change colour lightly. Now add all the dry masala and mix well. Lastly,add the mushrooms and mix well. Cook the bhaji covered for 5-7 minutes. Now remove the lid and let the vegetables cook on medium heat for about 10 more minutes.Once all the vegetables are cooked remove from gas and keep aside to cool down. Leave the vegetables till they come to room temperature. The filling shoudn't be hot. Wait till it cools down well before stuffing them in the puff.

Now,cut ur puffs pastry sheets in rectangle (As shown in sailu's link above..) or square. If you cut a square, put ur filling in the lower left corner of ur square, brush water to the opposite edges and join the diagonal corners to form a triangle. (I am so sorry I dont have step wise pics of this... will post them when I make my next batch..). I made this way as I wanted small puffs with less filling inside.....U may use the method sailu have given.

Once u have stuffed all ur curry puffs, place them in a cookie sheet or oven proof dishes and bake them. Reduce the heat of the oven to 375degree F and place the puffs in the oven for about 30 - 35 minutes.Once u see that the puff have turned golden brown in colour, off the oven and let it remain inside for 10 mins or so. Now, remove from the oven and serve hot.


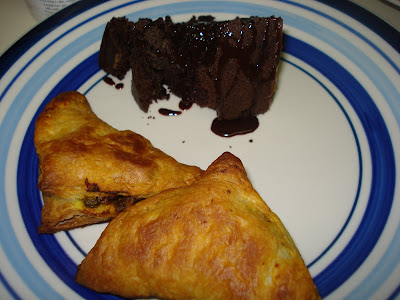
Curry puff and a piece of chocolate cake


What more do u need than Tasty hot curry puff and a piece of chocolate cake? Serve hot with Tomato Sauce. A lovely tea time snack.

Thursday, April 10, 2008

Eggless Moist Chocolate Cake


This is how my cake looked fresh from the oven. Smelling so sweet. This is real life saver recipe for all the first time (interested in baking from scratch ) bakers. I am very bad when it comes to baking or should i say unlucky....specially when it comes to cakes. I have seen so many cakes going flat in front of my eyes...just like a punctured tube....It used to be so funny. We used to be just seeing the cake through the oven glass and used to shout..."its rising, its rising" and suddenly in front of my eyes i used to see the cake go flat.... ohh how heartbreaking it used to be.... hmmmm but those were the old days when I rarely used to do things with proper measurements or sticking to the recipe. After so many flat cakes I have learnt a lesson "STICK TO THE RECIPE FOLKS."


I got this lovely eggless cake recipe from priya's blog ( http://dailygirlblog.blogspot.com/search?q=moist+chocolate+cake). You can check priya's blog for the recipe. I have cut the ingredients quantity into half. But forgot to cut the quantity of the cocoa powder. Guess due to that my cake wasn't sweet.It tasted a bit like lightly sweetend chocolate bread hehhee. The hershey's chocolate syrup helped me here....:P .But I guess its something I can mend when I bake this cake next time and I am surely gonna do that soon. I have also used Baking powder instead of the vinegar that she has suggested in the recipe. You can also use lemon extract instead of vinegar. The cake turned out amazingly soft and moist.


The icing done on the cake is very very easy to do. Once ur cake is done let it cool for sometime and then do the icing.I used a readymade chocolate frosting for this.

For the Frosting :

Pillsbury chocolate icing : 2 tbsp

Hershey's chocolate syrup


Method :

Touch and check of the cake is smooth. Make it smooth by lightly rubing with hands. Put the chocolate icing on the cake and spread it smooth with a cake spatula or spoon. Keep the cake in the refridgerator for 30 minutes. now remove the cake out and make the icing smooth again with a spatula. Now, make swirl on it using the hershey's syrup. I have also made a small flower using buttercream icing. Ur amazzing ake is ready. Enjoy!

Isnt it tempting?....Thanx priya for the easy and amaxing recipe. I also added choclate chips to the cake. :D try ur cake and let me know how it turned out...:D


Serve hot with ur evening coffee or with vanilla icecream as a desert. Enjoy!!


Vegetable pizza (pizza hut style)

My Homemade vegetable pizza


Whose doesnt like this?I love it and I am sure many love it too.May it be a Pan pizza, thin crust, or a hand-tossed pizza... the reaction by me is always yummmmm...!I feel like kissing the hand that invented this full or cheese, high calorie, less nutritional, junk but yet heavenly tasting dish....the only word i can say for him is "Bravo".


Some fact about pizza and its origin.Lets listen to what the inventors say.... Pizza is suppose to have originated from italy. So, how is pizza made in Italy?


Lazio style: Pizza in Lazio (Rome), as well as in many other parts of Italy is available in 2 different "flavors": 1) In take-away shops so-called "Pizza Rustica" or "Pizza a Taglio". Pizza is cooked in long, rectangular baking pans and relatively thick (1-2 cm). The crust similar to that of an English muffin and mostly cooked in an electric oven. When purchased, it is usually cut with scissors or knife and priced by weight. 2) In Pizza Restaurants (Pizzerias) it is served in a dish in its traditional round shape. It features a thin crust similar to the Neapolitan style. It is mostly cooked in a wood-fired oven which gives pizza its unique flavor and texture. In Rome a "Pizza Napoletana" is topped with tomato, mozzarella, anchovies and oil (thus, what in Naples is called "Pizza Romana", in Rome is called "Pizza Napoletana").


Other types of Lazio-style pizza include:


Pizza Romana (in Naples): tomato, mozzarella, anchovies, oregano, oil;

Pizza Viennese: tomato, mozzarella, German sausage, oregano, oil;

Pizza Capricciosa ("Capricious Pizza"): mozzarella, tomato, mushrooms, artichokes, cooked ham, olives, oil (in Rome, Prosciutto raw ham is used and half a hard-boiled egg is added);

Pizza Quattro Stagioni ("Four Seasons Pizza"): same ingredients for the Capricciosa, but ingredients not mixed;

Pizza Quattro Formaggi ("Four Cheese Pizza"): tomatoes, mozzarella, stracchino, fontina, gorgonzola (sometimes ricotta can be swapped for one of the last three);


Hot from Oven ready to be sliced

Different places different styles and tastes. Pizza is one dish with had adopted so many disguishes and captured the heart of people in that region. For got different coutries, did you know that US itself has around 12 varieties of pizzas......depending on the place we stay....and their speciality......


Various toppings may be added, most typically:


sauce, although traditionally tomato-based, pesto, alfredo and barbecue sauce are also used;

cheese, usually mozzarella but also provolone, cheddar, or a blend of other cheeses;

herbs and seasonings such as basil, oregano and black pepper;

fruits and vegetables such as garlic, artichoke hearts, mushrooms, eggplant, olives, onions, spinach, tomatoes, bell peppers, banana peppers, jalepenos and pineapple;

meat, such as sausage (pepperoni, salami or Italian sausage), ham, bacon, ground beef, and chicken, or seafood such as anchovies, tuna, salmon and shrimp;


In some pizza recipes the tomato sauce is omitted (termed "white pizza"), or replaced with another sauce (usually garlic butter, but sauces can also be made with spinach or onions). In the Philadelphia area there are also tomato pies — sauce only, or sauce with ripe Roma tomatoes and spices but no cheese — and upside-down pizzas, i.e., the cheese on the bottom and topped with sauce. Pizza is normally eaten hot (typically at
lunch or dinner), but is sometimes eaten as cold leftovers for breakfast.


New York-style pizza is a style originally developed in New York City by immigrants from Naples, where pizza was created. It is often sold in generously sized, thin and flexible slices. It is traditionally hand-tossed, moderate on sauce, and moderately covered with cheese essentially amounting to a much larger version of the Neapolitan style. The slices are sometimes eaten folded in half, or even stacked, as its size and flexibility may otherwise make it unwieldy to eat by hand. This style of pizza tends to dominate the Northeastern states, and is very similar to the basic style common through the United States and known simply as pizza. Many pizza establishments in the New York metropolitan area offer two varieties of pizza: "Neapolitan", or "regular", made with a relatively thin, circular crust and served in wedge-shaped slices, and "Sicilian", or "square", made with a thicker, rectangular crust and served in large, rectangular slices.


Chicago-style pizza, or Chicago-style deep dish pizza, contains a crust which is formed up the sides of a deep-dish pan. It reverses the order of ingredients, using crust, cheese, filling, then sauce on top. Some versions (usually referred to as "stuffed") have two layers of crust with the sauce on top. The invention of deep-dish pizza is "as American as apple pie", transcending a single ethnic origin. Deep-dish pizza was invented by Ike Sewell (a Chicago Jew) and first served in 1943 at Pizzeria Uno, which is still operating along with its twin restaurant, Pizzeria Due, in the River North neighborhood.


Chicago-style thin crust pizza has a thinner crust than Chicago-style deep dish, and is baked flat rather than in a deep dish pan. The crust is thin and firm enough to have a noticeable crunch, unlike a New York-style pizza, yet thick enough to be soft and doughy on the top. The crust is invariably topped with a liberal quantity of southern-Italian style tomato sauce, which is usually quite herbal or highly spiced, and typically contains no visible chunks of tomato. Next, a layer of toppings is added, and a layer of mozzarella cheese which frequently separates from the bottom crust due to the quantity of tomato sauce. Chicago-style thin crust pizzas are cut into three- or four-inch squares, also known as "party cut," as opposed to a "pie cut" into wedges. The small size of the squares makes it unnecessary to fold the slices. Chicago-style pizza is prevalent throughout the Midwestern USA. Chains that are well known for Chicago-style thin crust pizza are Home Run Inn and Old Chicago.


St. Louis-style pizza is a variant of thin-crust popular in and around St. Louis, Missouri. The most notable characteristic of St. Louis-style pizza is the distinctively St. Louisan Provel cheese used instead of (or rarely in addition to) the mozzarella common to Chicago-style thin crust.


California-style pizza refers to pizza with non-traditional ingredients, especially those that use a considerable amount of fresh produce. A Thai-inspired chicken pizza with peanut sauce, bean sprouts, and shaved carrots is a popular variant in California-style pizza restaurants, as are pizzas that use chicken and barbecue sauce as toppings. The style was invented by Chez Panisse restaurant in Berkeley, California, and popularized by the California Pizza Kitchen chain, along with Wolfgang Puck's various fine dining and casual restaurant chains and retail products.


Greek pizza is a variation popular in New England; its name comes from it being typical of the style of pizzerias owned by Greek immigrants. It has a thicker, chewier crust and is baked in a pan in the pizza oven, instead of directly on the bricks. Plain olive oil is a common part of the topping. Variations in other parts of the country include using feta cheese, Kalamata olives, and Greek herbs such as oregano.


Hawaiian pizza has Canadian Bacon (or sliced ham) and pineapple toppings with Mozzarella cheese. This type of pizza is especially popular in the Western United States, and is also a popular topping combination in Australia, Canada, and Sweden, but notably not in Hawaii. This type is also common within the EU, where it is known as Pizza Hawaii.

Taco pizza has ingredients usually associated with tacos, such as; lettuce, shredded beef or hamburger, chopped tomatoes, avocados, corn chips, cheddar cheese, sour cream and taco sauce.


Grilled pizza, invented in Providence, Rhode Island, uses a fairly thin crust cooked on a grill; the toppings are placed on the baked side after the pizza has cooked for a bit and flipped over.

English muffin or French bread pizza and pizza bagel are common convenience pizzas made at home in an oven or toaster, usually with a simple topping of tomato purée, sliced or shredded cheese, and perhaps pepperoni. French bread pizza is sometimes available commercially as a frozen meal.


New Haven-style pizza, also known as apizza, popular in southern Connecticut. It has a thin crust that varies between chewy and tender, depending on the particular establishment. The default version is a "white" pizza topped with only garlic and hard cheeses; customers who want tomato sauce or mozzarella cheese have to ask for them explicitly. Apizza has a very dark, "scorched" crisp crust that offers a distinctive bitter flavor, which can be offset by the sweetness of tomatoes or other toppings.


Amazing isnt it? Being in US i have eaten just 3 styles of these pizzas and I am now setting my eyes on eating or greek style pizza..... sound interesting.


Anyways, now getting back to the subject, my home made vegetable pizza.I am so happy and excited about the way the pizza turned out. I have always been a bit messing and unlucky when it comes to baking, but i guess now my stars are shining out. I got the pizza dough recipe somewhere online and had made a note of it, but never had the patience to try. So here iam noe trying it.The pizza turned out just like the one we get in pizza hut or dominoes. It even smelt so good. Okie okie... enough of my blah blah lets go to the recipe.


You need :


For the pizza base dough : for making 2 medium pizzas


All purpose flour - 1 2/3 cups

Salt - 1 tsp

Fine sugar - 1/2 tsp

Luke warm water - 1 cup

Dry active yeast - 1 tbsp

Olive oil - 4 tbsp


For the toppings for one pizza :


Presto sauce or marinara red sauce - 2 tbsp

Olive oil - 3 tsp

Dry Oregano - 2tsp


Vegetable toppings :


Onion - 1/2 sliced

Green bell pepper - 1/2 sliced

fresh mushroom - 2 sliced

Olives - 1/2 cup sliced or whole

Jalapeno - 1 sliced

red bell pepper - 1/2 sliced

Mozarella cheese 1 cup

You can add any other topping you want, like pineapple chunks, broccolli etc.


Method :


In a big glass bowl take the flour, salt and sugar, mix it well. Pour in the olive oil and mix well again removing any lumps. In a cup take luke warm water and put the yeast in the cup and mix well. keep it aside for 5 minutes allowing the yeast to dissolve well. Once the yeast is ready pour it into the flour and mix well to form a nice soft dough. The dough will be a bit sticky. Its okie.Add some more oil if needed. Now, cover this dough and keep it aside for nearly 3 1/2 to 4 hours. The dough needs this much time to rise. After 4 hours you will see the dough has almost doubled in size.


(sorry I havent taken step by step procedure pictures as I wasnt very sure how the pizza is turn out... I didnt even have a slightest idea it woud be so good. Will put in the pictures when I make the next time..)


Now, before making your pizza make ur vegetable toppings ready. I have used readymade presto sauce available in market, so that cuts my job of making sauce. You may also use pizza sauce. Once all ur vegetables n sauce are ready, let bake our pizza.


Pre heat your oven to 500 degrees with your pizza stone inside. I didnt have a pizza stone, so i used a big pizza plate. Take another pizza plate or any other flat plate where in u can make your pizza and later easily slide it into the oven for cooking. Normally they use a pizza peel for this. As i didnt have a peel too so i used another smaller piiza plate to make my pizza and slide it in.Putting a plate or stone in the oven for heating and then transfering the pizza into it helps the pizza to cook well and makes the base nice and crisp. So put one pizza plate or stone in the oven. Dust the other pizza plate with all purpose flour and keep it ready for making your pizza. If you dont have a pizza plate you can use any oven proof big plate for making your pizza and transfering.


Start with dividing the dough into half, take one half of the dough and dust flour to the pizza plate and on the dough. Press the dough a bit with ur palm and then start rolling it lightly using a rolling pin (Belan). when u have got a light round shape, keep the rolling in aside and spread the dough with your fingers.Before u start putting your topping i would suggest u to lightly lift ur pizza base and dust some more flour on the plate, so that pizza slides on the stone/ plate easily.


Now once your base is ready... brush olive oil on it, and pour in a table spoon of prest sauce in the centre of the base and spread it on the base, just like how u make dosa. See that the sauce doesnt go out of the base. Leave around 3-4 cm border around the pizza while spreading the sauce. Sprinkle the oregano on the pizza.Now put 3/4 of the mozarella cheese on the base. Now arrange all the toppings on it and sprinkle the remaining cheese on top.


Now , this is a bit tricky. To transfer the pizza. place ur pizza plate in an angle above ur pizza stone and slightly shake it, or push the pizza lightly to move it on the stone. See that u dont tear ur pizza while moving it. Dont apply too much pressure. REMEMBER : the pizza shud slid on the stone. Dont worry if your not able to transfer it. Start making the pizza on an oven proof plate so that if by chance you cant transfer it to the stone, u can always keep the plate inside the oven. And after 10 minutes once ur pizza cooks a bit u can easily move it on ur pizza plate / stone for further cooking.


Now obe u have transfered you pizza to the stone, Reduce the oven heat to 450-degrees cook it for 15 minutes or until the top of the pizza becomes light brown and crisp. You pizza is ready to be served.


Sprinkle some crushed red peper over it and serve it hot with tomato sauce. Enjoy your pizza hut style home made pizza!


Thursday, August 23, 2007

Baked bread Jalapenos rolls


Fried food.... its such a big sinster....hmmmm.....I love fried food.....but lately due to my increasing waistline....So I have reduced our family intake of oil. Hence lately it has been a complete cut on all the delicious deep fried snacks...hmmmm....
The other day somehow i got into the mood of making bread rolls.....and so on came with this recipe that doesnt consume much oil... or can say no oil at all... yet gives me the taste of the perfect jalapenos bread rolls. So enjoy the recipe and give me ur feed back..:)

Here goes the recipe. For making this scrumptous looking bread rolls....

You will need :

bread - 8 slices
Potatoes - 5 medium
Jalapenos - 8
Black Pepper Powder - 2 tsp
Red chilli powder - 2 tsp
Salt to taste
Chaat masala - 1 tsp
Coriander leaves chopped
Lemon juice : 5 tsp
Oil - 4tsp

Method :

Boil the potatoes and mash them well and put in the black pepper powder, salt, lemon juice, red chilli powder , and chaat masala.Mix it well and keep aside.

Cut the jalapenos lengthwise and remove all the seeds.You may put some seeds in the potato mixture too, if u wish. Now fill the jalapenos with some of the potato mixture and keep them aside.


Take the bread slice, dip it in salt water and squeeze the water. keep the wet bread slice on ur palm and spread some potato mixture on it.... Now place the stuffed jalapenos. roll the bread around the jalapenos in to a ball. Press it hard. apply some oil to ur hand and press again while shaping the balls. Once all the rolls are made. Place them on a baking tray and bake them at 375 F for 30 - 45 mins. Make sure to turn the rolls once in a while....for even cooking. Cook till the crust of the rolls become golden brown in colour.


Enjoy this great evening snack with Tomato Ketchup and a hot cup of tea.

Thursday, August 16, 2007

Moist Chocolate Brownies


Brownies.... ohh how much i love them.. no matter they make me fat.. ohh how much i love them... no matter its not too good for my little heart...... ohh how much i love them...... they r yummy....

This is the recipe I got from my friend's sister. It happened so that i friend had gone to visit his sister in Dallas and bought some home made brownie cakes from there. It was awesome and i really wanted to try it out. She was sweet enough to send me out the recipe. I increased the amount of chocolate specified by here. (i also added a spoon of unsweetened coco powder to the recipe). This made it chewier and rich... ummm..... iam mouth's watering as iam writing about it. ummmmm......so do try it and mail me ur comments....:) hey i even decorated the brownie...i made it for my hubby and just wanted to tell him how much i love him........:) so here goes the ingredients list......enjoy!


You will need :

8 tbsp (1/2 cup) - unsalted butter or margarine
4 oz - unsweetened chocolate (eg; Baker's, Ghiradelli)
2 tbsp - unsweetened cocoa powder (I used hershey's)
1 1/3 cups - white sugar
1 1/2 tsp - vanilla extract
1/4 tsp - salt
4 eggs (I used just the whites - dont like the smell of yolk. you may opt to use 2 eggs if putting whole)
3/4 cup - All purpose flour
2/3 - cup walnuts or almonds (roasted and chopped)
1/2 cup chocolate chips


Method:

Preheat oven to 400°F and line an 8-inch square metal baking pan with foil. If you don't have an 8-inch pan, use the aluminium foil pans available in the market.
Melt butter and chocolate in the microwave using low settings. Stir until smooth. Now add the cocoa powder to it and mix well again. See that the syrup is smooth and not lumpy.
In another bowl put the egg whites and mix well till a bit frothy. Now add the sugar, Vanilla essence and salt. Mix well again.. it the sugar dissolves in. Now add the flour in it.. and stir until well combined.

Add walnuts / almonds and the chocolate chips and mix again. Scrape batter into prepared pan and bake for 35 minutes.

When brownies are done remove from oven and place immediately in the freezer. If you don't have space in your freezer, make an ice bath instead.

Allow to cool completely then remove pan and cut brownies into squares.


I decorated my brownie with vanilla frosting and m& m candies. You may serve the brownies as it is.


Serve with hot coffee as an evening delight. Or top it with vanilla ice cream for an after super dessert.