WELCOME!


Powered by IP2Location.com
Showing posts with label side dish. Show all posts

Wednesday, March 9, 2011

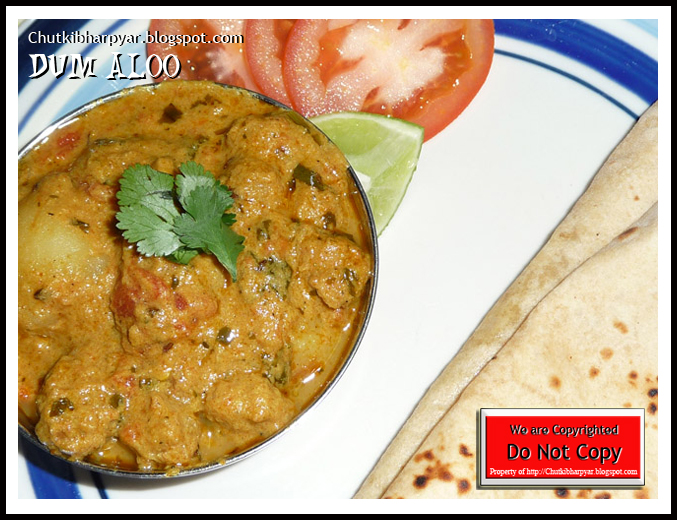
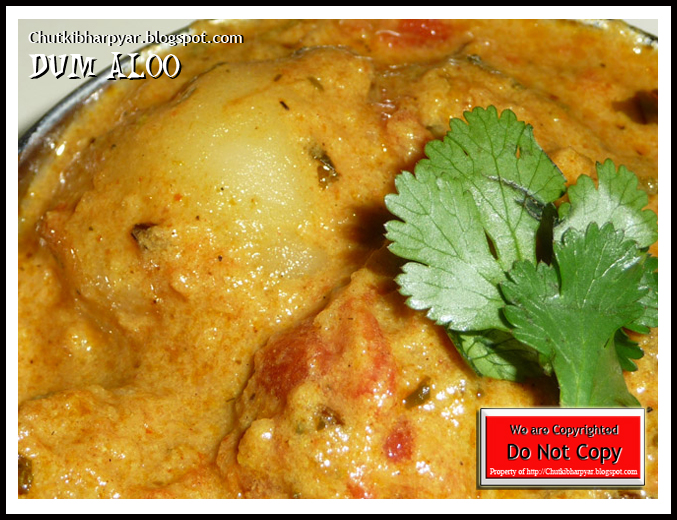
Dum Aloo


I love potatoes in all form. Fried, mashed, roasted, boiled, baked anyway u give it to me and I will eat it. I guess this is same with many people...now who doesnt love potatoes. It a boon veggie for moms. I dont know a single kid who hates potato. But beware it id not good for health when fried and roasted in oil. It is a starch and full of carbs so having too much of it is not advisable for ur tummies.

I always used to love the roasted Baby potatoes (Asokan as named by and dad and uncles) my granny used to make. She always used to make it along with Arachuvitta vengaya sambar (onion sambar). Yumm! what an terrific combination it used to be. Or the Aloo saag and mixed veggie curry my mom used to make to go along with phulkas. These were the main curry forms of potato I was accustomed to at home. So when it came to making Dum aloo It was a new dish for me as I have never tasted this before (even in restaurants or at home) never seen anyone make it too..although I have heard the name several times. One solace was that it was made of roasted mini potatoes (just like the Asokan my granny used to make.) and hence I jumped into trying this recipe for the first time. I followed this recipe....mainly coz it didnt ask me to deep fry the potatoes unlike many. I made few changes but nothing major. So here goes..:)

Ingredients :

Small red potatoes / baby potatoes - 5 to 6

Oil - 1 tbsp + 1tbsp

Curd or yogurt - 4 tbsp

Kasuri methi - 1 tsp crushed

Turmeric powder - 1/2 tsp

Kitchen king Masala - 1 1/2 tsp

Garam Masala powder - 1 tsp

Coriander-cumin powder - 2 tsp

Fresh coriander leaves for garnish

Tomato puree / canned tomato sauce - 1 small can

Ground Masala paste ( of 1 medium onion, ginger- 1" piece, garlic - 4 pods, Green chilli - 1 ground without adding water)

Method :

Preheat the oven to 350 degree F.

Boil the mini potatoes and peel them. Now poke holes in it using a fork. Now spread the potato on a baking tray and coat them with some oil. Place the potatoes in the preheated oven and let it roast for 20 minutes until the skin becomes lightly crispy.

For the gravy take the rest of the oil in a non stick pan and add the ground masala and saute well until the raw smell of onion goes off. Add the tomato puree and cook well till the tomato puree cooks well and the sauce reduces a bit. Add water if the gravy is too thick. Add the masalas (garam masala, KK masala, CC powder and salt and mix well. Let it simmer for 30 minutes or so.

Add the baked potatoes to the gravy and coat it well with the tomato gravy.

Beat the curd well in a small bowl and pour it on the potato and mix well. Make the gas flame low and let it cook on simmer. I added dum by cover the top with a tight lids and sealing it with maida dough on the rim....for the dum effect. U can skip this too. I cooked the curry on dum for 30 mins on the lowest heat. Remove it from heat and set aside for 5 to 10 mins. remove the seal and garnish with fresh coriander.

This was amazingly tasty. I am glad I tried Dum aloo....do try it and leave me ur comments and experience.

Friday, February 18, 2011

Tofu in Chilli garlic Sauce

I got this recipe from a friend in a common orkut community. I had to try this immidiately. Lucky for me I had all the ingredients needed for making this curry. So here it goes. Thanks Meena for sharing this super easy recipe with me..:)


Ingredients :

Firm Tofu - 1 pack
Baby corn - 1 can
Broccolli florets - 1 cup
Red onion - 1/2 cup sliced
Garlic - 12 pods (finely chopped)
Sesame oil /Olive oil - 1 tbsp
Red Chilli paste - 2 tbsp (I used Sambal Oelek)
Tomato Ketchup - 4 Tbsp
Vinegar - 1/2 tsp
Sugar - 1/2 tsp
Celery - 1 stick (finely sliced)
Green Capsicum - 1 (chopped in chunks)
Ching's all-in-one sauce - 1 Tbspn ( I used simple Soya Sauce)
Salt to taste
Cornflour - 1 tspn

Method :

1) Drain and wash tofu and cut into cubes. 2) Heat oil in a wok and stir fry the garlic for a minute or so. 3) Add celery, onion and spring onion and stir fry for 2 mins. 4) Add the Broccoli, capsicum and baby corn and stir fry well for another 3 mins.

5) Mix Cornflour in 1/2 cup of cold water and keep aside. 6) Mix salt, sugar, vinegar, Tomato ketchup, red chilli paste and ching's All-in-one in a cup and mix well for a minute.

7) Add tofu to the stir fried garlic and mix gently. 8) Add the conflour and spice mixture to the tofu along with a cup of water and stir. 9) Let it boil for 5 to 7 minutes and bring it down to a boil.

Serve along side fried rice or noodles and enjoy :)

Thursday, February 10, 2011

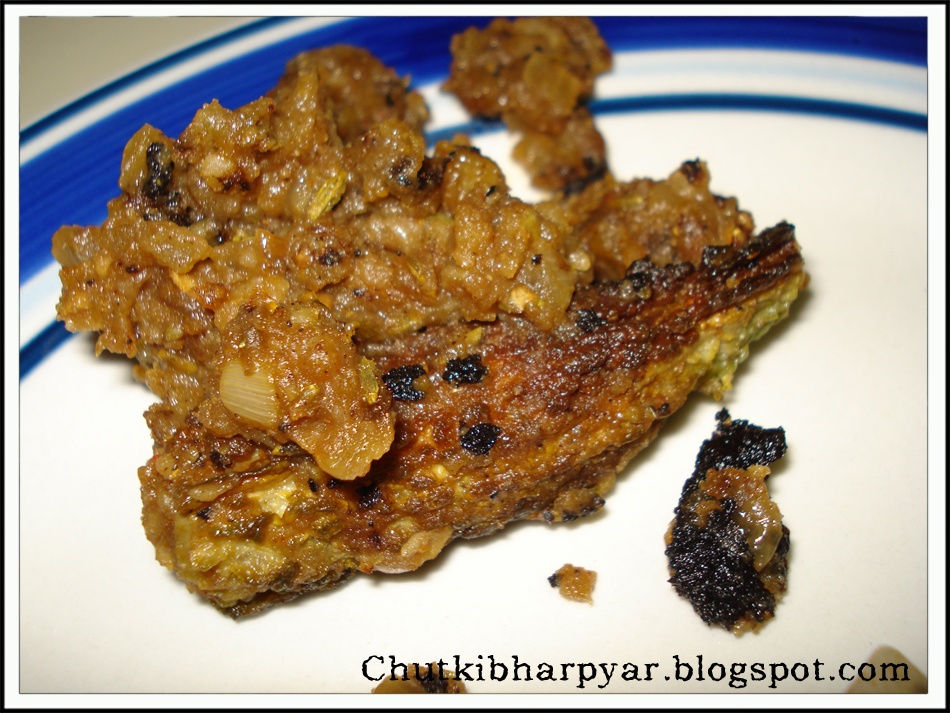
Khatta Meetha Stuffed Karela


I hate Karelas..... yes literally hate. But this one recipe was something which I love....inspite of it being made with karela.... The best part is... u cannot taste the bitterness atall..:)

I got this Idea from a college friend who used to get these in her dabba. I never bothered to taste it then because it was karela, but now when I think and see how much nutrients r there in karela.. we (me n R) r trying to get it into our food list..:) As we both hate it, I had to try some recipe which will make it easier for us to try it..:P


Hence came this recipe of Khatta meetha Karela...:)


Ingredients :


Karela / bitter gourd - 6 (ends cut , slit length wise and scooped out )
Onion - 1/2 cup finely chopped
Tomato - 1 1/2 cup finely choped
Ginger n garlic - 1 tsp finely chopped
Potato - 4 big boiled
Tamarind pulp - 1 bsp
Jaggery - 1 lemon size piece or 2 to 3 tbsp (depending on how sweet the jaggery is )
Salt to taste
Chaat masala - 1 tsp
Red chilli powder- 1tsp
Garama Masala - 1/2 tsp
Amchoor powder - 2 tsp
Turmeric powder - 1/4 tsp
Cumin coriander powder - 1 tsp
Oil - few tsps


Method :


1) Clean the karela and wash it under running water. Sprinkle about 1 to 1 1/2 tsp salt on the karelas and keep aside for 2-3 hrs. The karela will leave water.
2) Drain that water and rinse each karela well under running water. I dont like the bitter taste at all in the karela....atleast for my first try with it. This process will remove most of the bitterness from the karela..:) U can skip this if ur okie with the bitterness :d


3) Now for the filling. In a pan take some oil and add the ginger garlic paste. fry for 2 minutes and add the chopped onions.
4) When the onions r tender n pink add the tomato along with the red chilli powder, garam masala, turmeric powder, chaat masala and coriander cumin powder. Mix well and let the tomato cook well and become pasty.

5) Now add the mashed potato and mix well. Let all the spices mix well into the Potato. Add salt to taste and amchoor powder. Remember u have salt in the karelas too so be careful not to over salt ur filling.


6) Add 1/4 cup of water to the tamrind pulp and mix well. Dissolve the jaggery in the tamarind juice and mix well. I used powdered jaggery which was easy to dissolve..:)
7) pour this mixture over ur filling and give a final stir. Mix well and ur filling is ready now..:)
taste it and add more amchoor or red chilli powder as needed.


8) Now comes the assembly and cooking. Stuff this filling inside the slit karelas. If ur karelas r sleek they will hold the filling well. Mine weren't holding the filling so I tied it with a thin thread. This helped the filling from not coming out when cooking.


9) Now u can either steam this in a pressure cooker or shallow fry it in a pan or Tava. I went for the option 2. Fry the karela till its crisp and dark brown spot appear on it..:) Your Khattha Meetha Karela is ready to be savoured..:D

10) If u have any leftover filling add it to a pan and pour 1/3 cup of water to it. make it like a gravy and add the fried karelas to it. It will become Bharva karela curry :D.


Enjoy it the way u want..:d. We loved it :)

Wednesday, February 2, 2011

Tandoori Veggies

Photobucket
Well as a lovely friend said....looks like I am on a streak...:) I am posting almost everyday from the past 4 days....which beleive me is a lot according to my earlier posting schedule :P. Hope I keep the good work on.

Anyways coming to the recipe....its a vegetarian tandoori dish using tofu and other vegetables. Many friends who saw this pic first thought I have become a non vegetarian and started cooking mutton or chicken....hmmm maybe they thought so because of the colour. But I guarantee this is pure pure vegetarian dish :P

It easy to make and goes good as an evening snack or serve it on a platter of pulav n raita..:)

Ingedients :

Firm Tofu - 1 cup (chopped in big cubes)
Green bell pepper - 1 cup (chopped in big chunks)
Cherry tomato - 1 small box
Button Mushrooms - 1 small box
Chinese eggplant - 1 (chopped in thick slices)
Zuchini - 1 big (chopped in thick slices)
Onion - 1 medium (cut in big chunks keeping the layers intact)
Garlic - 3 cloves (minced)
(you can use other veggies like squash, potato etc)

For the Marinade :

Salt to taste
Hung curd - 1 cup
Tandoori Masala - 2 tsp
Chaat masala - 1 tsp
Kitchen king masala - 1/2 tsp
Pepper - 1/2 tsp
Ginger paste - 1 tsp
Coriander cumin powder - 2 tsp
Red chilli powder - 1 tsp
Lemon juice - 2 tsp
Olive oil - 1/2 tbsp
Red food color - 2 pinches (optional)

Method :

1) Preheat the oven at 350 F.Mix all the marinade ingredients in a bowl (except oil). Beat it well into a smooth paste. Do a taste check and adjust the seasoning.. the marinade should be nice n thick...not runny. see that ur hung curd has no water in it at all..:)
2) Put all ur chopped vegetables in a big bowl. Add the marinade to this and mix gently. Dont mush or break the vegetables. U can use ur hand to toss it gently.....so that the marinate coats all the vegetables well.I do that :) Cover and leave it here for atleast an hour.
3) After an hour thread in the vegetables in any order u want into a wooden skewer. Wet the skewers before threading the veggies so that they dont burn in the heat from the oven. U can even skip the sweker and actually roast these of stove top using a hot hot pan / tava :)
4) Anyways once u have threaded the veggies place them in the preheated oven for 15 minutes. keep turning it in between and keep and eye on the oven all the time. U dont want ur veggies to be burnt...:). Additionally u can run the oven at "broil" for 2 mins maybe to give it a charged look...:)

Ur Tandoori veggies r ready. Remove it from the skewers and serve it along with some yogurt dip or simply serve it on ur vegetable pulav. Enjoy !

Monday, July 19, 2010

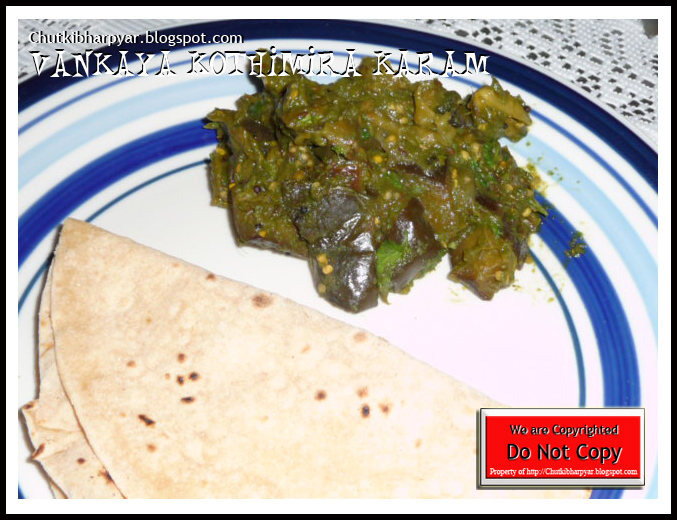
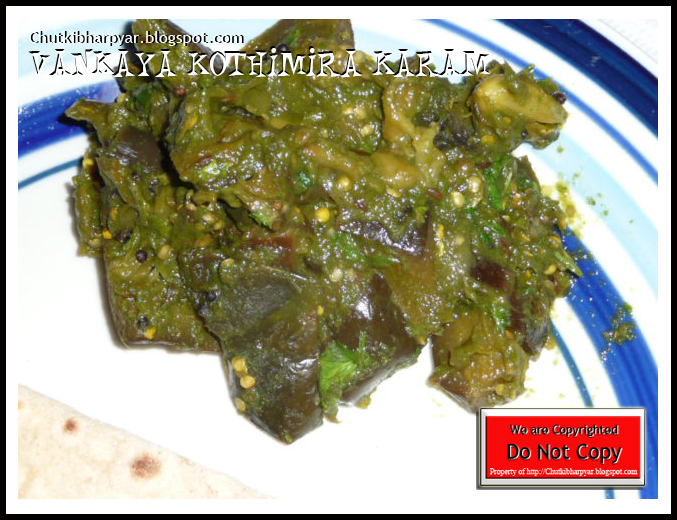
Vankaya Kothimira Karam

This Curry was taught to me by my Jyothi Akka. It tastes awesome and is a delish side for Chapati, roti or just with plain steamed rice. I make this anytime I have an excess of Coriander leaves in my refrigerator. I have tried this curry with Okra, Potatoes and even raw banana... and it always tastes so good.

Here goes the Recipe

Ingredients:

Small Indian Brinjal/ Eggplant : 6
Green chillies : 2-3 (depending on the spiciness of the chillies)
Ginger : small piece
Coriander leaves : 1 medium bunch
Jeera : 1 tsp
turmeric pwd : 1 tsp
Salt to taste

For tempering

Mustard seeds :2tsp
Urad dhal : 1 tsp
Oil
Dried whole red chilli : 2


Method :

Clean and roughly chop the coriander leaves. Add it to a blender and blend into a paste along with ginger, green chillies and jeera and little salt. Keep aside.

Clean and cut the eggplant lenghtwise. In a deep bottomed pan add oil. Put the jeera and urad dal and wait till the jeera crackles. Now add the mustard seeds and allow it to splutter. Add the cut eggplant. Add salt and turmeric and cooked covered till the eggplant becomes tender ad cooks well. Dont worry if the eggplant becomes mushy.thats Okay. if u dont like it mushy... cook the eggplant without covering and keep stirring..:)

Once the eggplant is cooked, add the coriander paste to it and mix well. Allow it to cook for 8 mins more and turn off the heat. Cover and leave until ur ready to serve.


This is an awesome curry and the best part about it this is... its naturally favoured. The smell is so tantalising.... just yummy....:D do try it and give me ur review on it...:D


Sunday, February 21, 2010

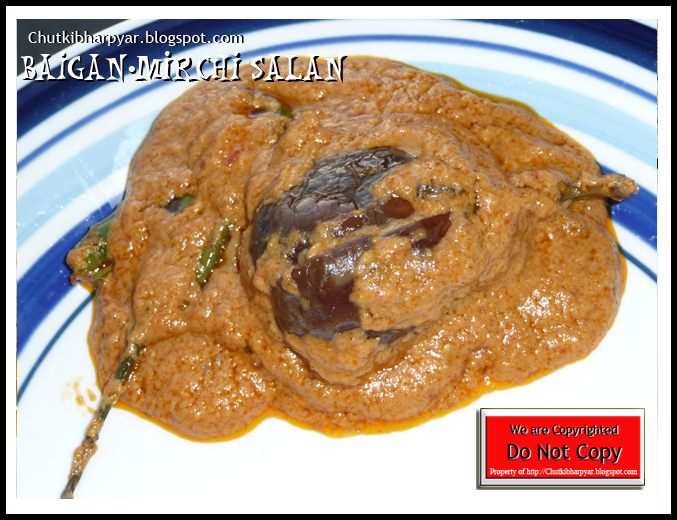
Baigan mirchi ka salan

Baigan ka salan is a very famous Hyderabadi dish which is eaten along side biryani. I wanted to try this from a long time but just now got the time. When I saw searching for this authentic recipe I came across this site. Got this awesome recipe and I had to try it. I made this salan as a side for phulkas. The main recipe calls only for baigans (eggplants) but I also went ahead and added some green chillies for the perfect combination of Mirchi (chillies) & Baigan (eggplant) Salan...:)


Ingredients :

Indian Small Eggplant - 10
California chillies - 2 or 3 (or u may use any less spicy chilli)
Oil - 2 tbsp
Onion -1 chopped and blended into paste
Ginger Garlic Paste- 1 tbsp
Salt
Tamarind - Soaked and strained
Tomato Puree -1/2 cup (try to use fresh tomatos for puree..)
Masala / Roasted Peanuts -Fistful
KhusKhus -1 tbsp
Jeera or Cummin seeds-1/2 tbsp
Methi seeds or Fenugreek seeds-1/2 tsp
Dry coconut - 2 tbsp
Dry Whole red chilli - 2
Dhaniya or Coriander seeds -1/2 tbsp
Seseme seeds - 1 tbsp

Method :

Prepare by washing the eggplants and green chillies well. Do not cut the stem off from eggplants. Make 4 slits on the sides of the eggplant but do see that u dont cut them off there stem. The Eggplant should remain in one piece after slicing in 4 parts. Slit the green chillies in the centre and remove the seeds if u wish. Cut the chillies into half and keep aside.

Heat the oil in a flat pan and once the oil is hot add the cut egglpants and cover with a lid. Let the eggplants cook on medium heat or till they become tender and somewhat brown in colour.Keep aside. Do the same for the green chillies and keep aside.
Now for making the masala we have to grind few ingredients.If using unroasted peanuts see that u dry roast them well. (I used roasted ones for ease) Dry roast the khus khus and sesame seeds. Dry Roast Fenugreek and cummin seeds together. Add coriander seeds after the two are half roasted. Once you start smelling cummin seeds, turn off the stove and add dry coconut. Let everything cool down completely. Now, make a paste of this and keep aside.

In a heavy bottomed pan heat some oil. When the oil is hot enough, add the onion paste. Saute it for few minutes and then add the ginger garlic paste. Mix well until it starts browning. Now add the tomato puree and fry until the raw smell of tomato goes away.

Now go ahead and add the ground masala. Mix well and cover the pan. Let it cook for few minutes and add salt and red chilli powder. Stir for 1 minute or so and add the fried eggplants and green chillies. Mix well. See that ur gentle and u dont mash or break the eggplants off their stems. Add the tamarind and let it simmer a little while.Check for salt, chilli powder and tamarind and add it according to your taste. The masala can be made and frozen for future use and it will taste equally good as the freshly ground. Ur Baigan Mirchi ka salan is ready to be relished..:)


Enjoy with hot phulkas, parathas, rice or biryani.

Thursday, April 30, 2009

Dahi Wale Aloo


I am a potato fan... whenever I am bored or stuck on what to make to go along with chapati the only vegetable (root) I can think of is Potato. Mainly coz its always there at home (I always keep it handy. Its like tissue rolls, refill as soon as its over..:P) and secondly coz anything u make with potato kind of tastes awesome and yet so simple to make...:)

Dahi wale aloo is a very simple and creamy potato gravy curry and it goes so well with phulkas..:) I make it very often at home.It can be made with just the potatoes... I have added tomato to the dish to make it more tangy but if u dont have tomato u can always skip it..:) So here goes the recipe...:)


Ingredients:

Potato - 3 (parboiled and cubed )

Tomato - 1 Chopped (optional)

Turmeric powder - 1 tsp

Dhania - Jeera Powder - 2 tsp

Garam Masala - 1 tsp

Salt to taste

Red Chilli powder - 1 tsp

Jeera (Cumin seeds) - 1 tsp

Hing (Asafoetida) - 1 or 2 pinches

Ginger - 2 tsp

Mint leaves - 3 tsp finely chopped (optional)

Green chillies - 1 tsp

Yogurt - 1 cup

Oil or Ghee - 2 tsp

Coriander leaves for Garnish

Method :

Firstly heat the ghee and when it gets hot enough, add the cumin seeds and a pinch of hing and let it splutter. Once the cumin is done add the finely chopped ginger and green chillies and saute it till it browns up a bit.

Now, reduce the flame and add the yogurt at intervals (divinde the yoghurt in 3 parts) and stir it well so that the yoghurt blends with the masala. See that there are no lunps. Stirring fast avoids lumps so do it..:)

Add all the other ingredients including the boiled potato and mix well. (dont add the mint and coriander leaves now...:)..keep it aside for garnish )

Stir well to see that everything is blended well nicely. Cook the potaoes on high heat until it fries a bit. Pour Aproximately1 cup water if u think the curry is too dry and let it simmer for 15-20 minutes.
Add the fresh mint leaves and cover with a lid so that the mint leaves wilt in the heat of the curry. Mix well and garnsih with coriander leaves. Serve hot along side of pickle and chapatis.


Serve hot with phulkas. Enjoy with awesome gravy bhaji.

Wednesday, March 25, 2009

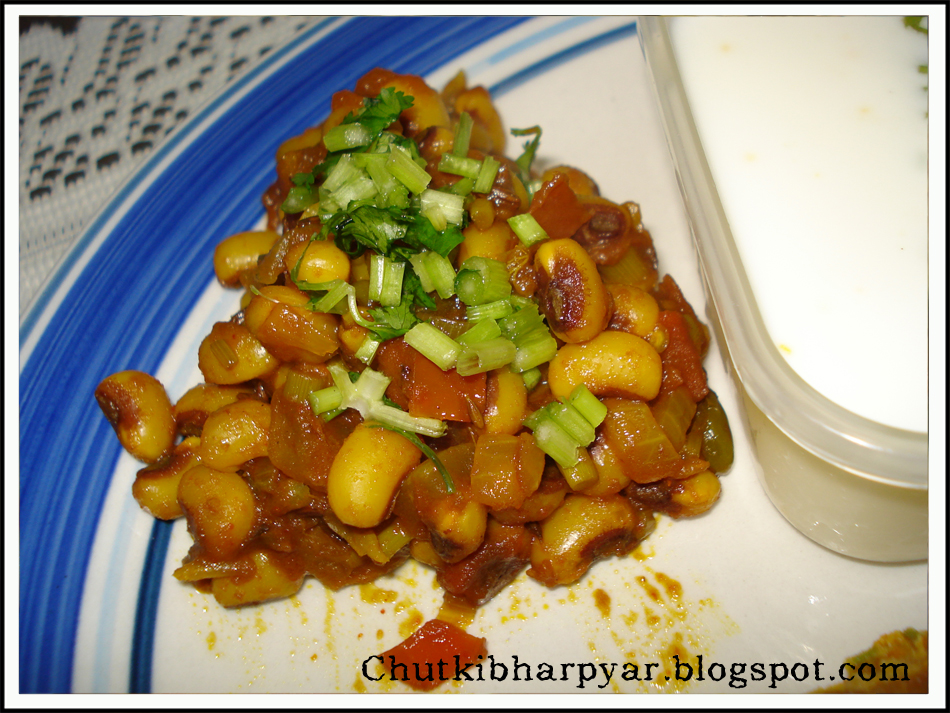
Lobiya Masala & my 150th Post


Yipeeeeee....! I am 150 posts old...:D Cooooool.... and its time to have a mini celebration...:d Thank u all my friends and other bloggers who helped me thru all my troubles...with ur lovely words and comforting support. Love u all...:) Thank u once again !


I am not a big fan of Lobiya (arabic) known as black eyed beans and also known as Chavali in hindi. But i do like the fresh black eyed peas which I made a bhaji out of to eat along with chapati.

Some facts about Lobiya: "Originally native to Africa, but widely grown in many countries in Asia, the black-eyed pea was introduced into the West Indies and from there to the Southern United States as early as the 1600s in Virginia. Most of the black-eye pea cultivation in the region, however, took firmer hold in Florida and the Carolinas during the 1700s, reaching Virginia in full force following the American Revolution. [1] The crop would also eventually prove popular in Texas. Throughout the South, the black-eyed pea is still a widely used ingredient in soul food and various types of Southern U.S. cuisine. The planting of crops of black-eyed peas was promoted by George Washington Carver because, as a legume, it adds nitrogen to the soil and has high nutritional value. Black-eyed peas are an excellent source of calcium (211mg in a 1 cup serving), folate (209mcg), and vitamin A (1,305 IU) among other nutrients"

Traditionally lobiya is supposed to be eaten for goodluck on the "New Year's Eve" in the southern American region. The same is the custom in many other countries. Actually I remember my mom making sweets using lobiya known as "karamani or payar" in tamil. So this is also a tradition in southern part of india I guess... hehhe..:) Nice discovery right?Anyways enough of the history of this bean. Well I came to make this recipe coz I had lot of frozen lobiya in my freezer. So here goes the recipe....

Ingredients :

Frozen Lobiya - 2 cups (thawed at room temperature)
Onion - 1 finely chopped
Tomatoes - 2 finey chopped
Green chillies - 2 slit lenghtwise
Minced Ginger - 1 tbsp
Garam Masala - 2 tsp
Salt to taste
sugar - 1/4 tsp
Green corinader leaves for garnish
oil
Jeera - 1tsp


Method :

Thaw the lobiya and steam it in a microwave for 4 minutes (high).

In a kadhai heat the oil and add the jeera. Allow to splutter and then add the ginger and green chillies. Saute for few minutes. Now add the onions and mix well. Cook till the onions r transparent. Add the tomatoes and cook till the tomatoes r tender. Add the salt, sugar and garam masala. Mix well. Add the lobiya mix well. Add 1/2 a glass or water and cook it covered for 5 minutes on medium heat. Stir in between. Cook till the water reduces a bit and the bhaji is no more liquidy.

Garnish with corinader leaves.

Serve with hot phukas or chapathis...:) Enjoy

Tuesday, June 17, 2008

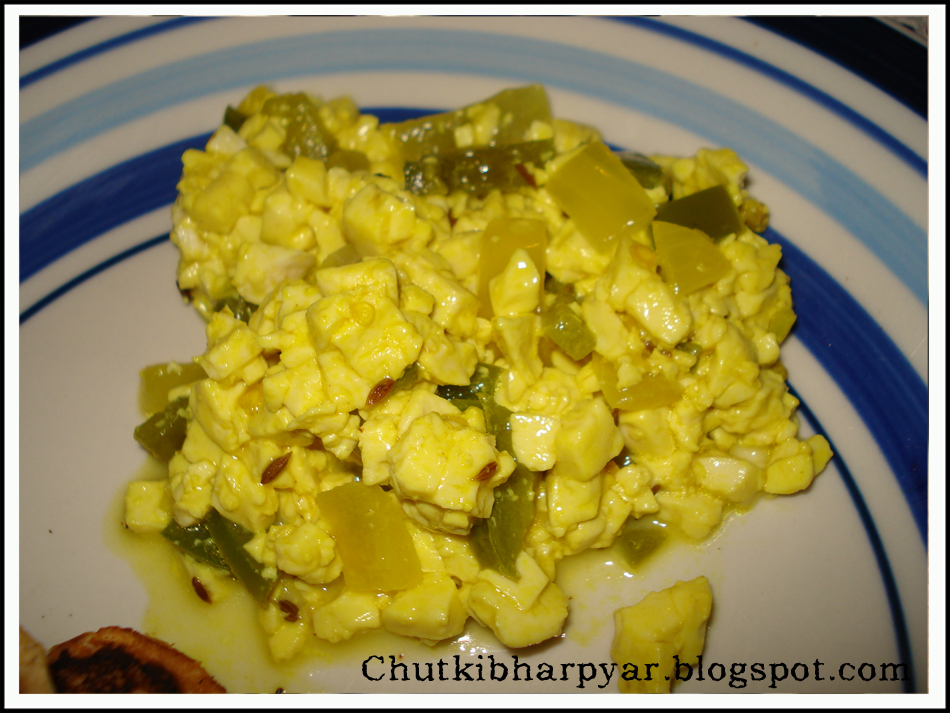
Vegan Masala Scrambled Tofu


I am not a vegan but I love tofu.... Actually me and my hubby...we both love tofu. He is the one who introduced me to tofu.. and I am so glad he did. We love scrambled egg but as we r trying to cut eating egg now....atleast buying them... other than for cakes..(sudden cultural awekening..:P..u see?)So we r trying other options to have the same crumbly texture and taste.

I happen to eat this at a cousins place for breakfast and we instantly fell in love with it. So I tried my hand at it and I can say I was successful..:) I am sending this recipe to the Eat healthy event- Protein Rich hosted and started by Sangeeth.


You need:

Extra Firm Tofu : 1 packet
Green chillies - 3 finely chopped
Ginger-garlic paste - 2tsp
Fresh coriander leaves - 1 cup finely chopped
Onions - 1/2 cup finely chopped
Green bell pepper - 1/2 cup finely chopped
Salt to taste
Corinader -cumin Powder - 1 tsp
Garam Masala - 1 tsp
Lemon juice - 2 tsp (optional)
Oil - 3 tsp


Method :

Drain water from the packet of tofu. Remove the tofu out and pat it dry with a kitchen towel or paper napkin.Wrap it in a paper napkin and keep it aside.

In a nonstick pan, take some oil and add the green chillies and ginger garlic paste. Saute till the ginger garlic turns light brown. Add onions and saute for 5 mins. Add the spices and the salt. Saute well.
Lastly add the green bell pepper and saute well for 10 mins or until the pepper is cooked well.

In the meantime. Remove the tofu from the napkin and put it in a bowl and mash it with hand. You may even make small cubes of the tofu, lightly mash it with a laddle and add it to the cooked vegetables.Stir fry for 6-7 minutes

Garnish with fresh coriander leaves and lemon juice. Serve along with a slice of garlic bread.


Serve hot as a Breakfast or as a lunch side dish.


Thursday, June 5, 2008

Lima bean stir fry


This is an amazingly easy recipe. Crunchy, tasty and so nutritious. We love this. I make it with any kind of gravy dish as a side. I had no idea what is Lima beans until I came to USA. We do get this in India ( I got know from my mom in law who told me these are the beans from avaraka ( Chikuduka..) and are available in India.) only that I didnt know about them.. until I came to USA. So here I experiment with the lima beans in a simple recipe and from then on there was no looking back for me. For making this....

You need :

Lima beans frozen/fresh - 3 cups

Red chilli powder - 2 tsp

Lemon extract - 1 to 2 tsp

Salt to taste

Oil - 1/2 tsp

Green onions - 3 stalks finely chopped

Method :

In a Pan take some oil and add the lima beans to it.. Stir fry for 10-12 minutes... until the the lima beans are cooked and brown spots atrt to apear on them. Add the red chilli powder and salt and mix well. Leave it on for 6-7 minutes until nicely roasted and fried. Add the chopped green onions on top...stir fry for another 3 minutes and Remove from flame. Your Lima bean stir fry is ready... and it just tastes yumm believe me...:) You can eat it as it is... as an evening snack...:) Enjoy!


Doesn,t it look awesome? Try, enjoy and do send me ur reviews about it....:)

Tuesday, May 13, 2008

Dal Makhani and Cooking 4 all Seasons

Delicious looking Daal Makhani......Served!


I like all kind of lentils. But as a kid I was never exposed to so many varieties of Daal that we get now. By daal I dont mean dried lentils but the daal preparations. Daal Maharani, Daal tadka, Daal Makhani, Rajasthani Daal, Hyderabadi Daal, Palak daal, Mango Daal, Tomato daal, Aamti, Varan... ohhh and the list just goes on.... Guess we can have a whole event just on daal varieties....:) isnt it?? Well so the daal that I knew was dal fry that my mom used to make at home to go along with her yummy fluffy phulkas or chawal. I am so surprised to open a restaurant menu card and see so many varieties of daal now. We never used to get so many varieties believe me. Atleast I have never seen or tasted them. So, when I am seeing so many varieties now, I almost everytime get confused. How it will this daal taste? How is it different fro my Daal fry?.But then,thanx to the modern culture of going to restaurants...and ofcourse my friends, I am exposed so many varieties now.

I learnt a lot about the traditional south Indian pappu (daal) from my mother in law... who taught me to make a variety of pappus like Pala kura pappu, tomato pappu, mamadikaya pappu... which me and my hubby simply loveeeeeeeeeee......!

So Coming to My daal Makahni, I wanted a recipe which will be simple and easy to make as well traditional with all the flavours intact. In short the exact one we get in restaurants in India... ummmmm! Yummy. I came across such a recipe in Srivalli's blog and just jumped on to make it. So today, I am presenting Srivalli's Daal Makhani and her Lovely blog.... Cooking 4 all seasons..:)


I made few changes from Srivalli's recipe.....but the base recipe is the same...:) So to make this

you need :

Sabut Urad Daal / Black lentils - 1 cup (soaked overnight)

Rajma /Kidney beans - 1/2 cup ( I used canned, u may use dried & then soak them overnight)

Butter / ghee - 1 tbsp

Oil - 2tsp

Jeera /Cumin seeds - 1tsp

Onions - 1 medium finely chopped

Tomatoes - 2 finely chopped

Garam masala powder - 2 tsp

Turmeric powder - 1 tsp

Red chilli powder - 3 tsp

Ginger - around 2 tsp (finely chopped)

Garlic - 5 pods (finely chopped)

Low fat Cream - 1 1/2 tbsp ( Ok I used Low fat sour cream here...dont look at me like that....:P)

Low fat Yoghurt - 1 1/2 tbsp

Salt to taste

Fresh coriander leaves to garnish

Method:

Pressure cook both the soaked daal with a bit of salt. Mash it with the back of the ladle and keep it aside. See that the lentils are seen and that to dont make it into a paste.

Add the youghurt and the sour cream together and mix well. Keep it aside.

In a pan, take the oil and jut in the jeera and allow it to splutter. I addded jeera to my Daal as I love the aroma jeera gives and secondly as jeera is good for digestion, I prefer using it with all my lentil preperations...;). So once the jeera is ready, add the chopped ginger, garlic and onions. Saute well. Add in the tomatoes and the masala and mix well. Let it cook till the tomato are tender and a bit mushy. Add salt. Remember u have already added some salt to ur lentils while pressure cooking.Now add the lentils and around 1/2 glass of water to it.Let it cook and take in all the flavours. Cook covered for around 8 minutes on medium-low. Mix it and add the yoghurt and sour cream. mix well once again. Cook open for another 6-7 minutes on medium low. Your Daal is ready.

Transfer to a serving bowl and garnish with fresh coriander leaves and serve hot with Paratha or rice.

My lunch plater ready with laccha paratha, onions and delicious Daal Makhani.

Now somethings about Srivalli and her lovely blog Cooking4all Seasons.

If you have ever heard of the Events.....Microwave cooking, microwave cakes event....Dosa mela or the on going Roti mela... I am so sure you know srivalli too. She is the one who started this lovely event on her even more lovely blog...Cooking 4all seasons. I Simply love her blog. Its nice with lovely recipes and tempting photographs, Stories about her kids and her family. So much of affection and love flows in this blog....Dont miss her Tom and Jerry sketches...check it out!

Do not miss the amazing dosa variety and the traditional andhra style dishes.....she has in her blog... I simply adore it. What creativity and patience....phew.... god please give me that.... I pray... all day ! Iam sure gonna try more and more from her blog.... specially the andhra variety....as my hubby is from hyderabad... and I am sure he will appreciate it and maybe give me a pat on my back....:D. So Srivalli, thanx for the lovely 230 and more recipes u have shared with us.... U simply rock...:) to know more about her...and her recipes... Check her blog..:)

So, again thats it from me for now...... will post another great recipe that I always wanted to try and a blog that I adore...:)....there are sooooo many of them..... ohh my god... Is may enough??!! I am thinking.....................n thinking.... and still thinking....................................;)

Friday, May 9, 2008

Today's Special Choley Batura - Indira's chole and Vee's Batura


Its time for another celebration...!


Hi there all of you. I am so sorry I couldn't post any recipe yesterday. In future will try to post one recipe one day.... except weekends... hehe...Anyways, today is a very special day. Today my brother Karthik and sweet sister in law Ramya Celebrate their First wedding anniversary. I am missing them so much wanted to join them in their celebration. So here is wishng them a very very happy First wedding anniversary. Well I didnt make any sweets for wishing them due to time constrains so I am sharing a lovely italian lunch as my bhabhi loves italian food.(will post the recipe later.) And my sooji halwa once again. You can see the recipe here.


Wish you both a Lovely First Wedding Anniversary !


My special lunch for my brother and bhabhi.:)


Italian lunch - Spicy Pasta, Spring onion Pilaf, Warm vegetable salad

Yummy Sooji Halwa with chocolates.


Now, coming to my daily food blogging. Today's special is Chole batura.


My Lunch platter - Choley, green salad and batura.


My today's special is Choley batura. My hubby loves choley and I would also like to add that he makes very good choley. I wont say that its the most perfect choley but it is very good with its natural flavour. Infact I can say he is the one who taught me to cook with the natural flavours in the vegetables and pulses... than overflowing the bhaji with masalas, which I used to before I got married. So I really want to post this dish for my sweet husband.

So coming to the topic, both me and my hubby r ardent fans of choley Bature.... I dont enjoy Bature that much but I love choley. Whenever I make choley I dont stick to one recipe. I keep changing my concoction by adding or minusing something.... just to see how it tastes.

Well, when talking about experimentng with choley who can beat my "Choley Queen" Indira of mahanandi. Yeah I have named her the choley queen. why?? hmmm...If u peep in her site and just type choley u will be amazed to see the varieties she has there... and above that the different and unique combinations of vegetable with the tiny garbanzo bean (choley bean - kabuli chana).

Ohh my god, choley with so many different vegetables.what creativity....Choley with eggplant, choley with aloo, choley with doodhi,with methi, with tinda..... hmmmm and many many more other yummy recipes.


When I saw her choley recipe I was so inspired to make it.. mainly because of its simplicity. Its so simple with very subtle masala flavour and so easy to make. I wanted to try her recipe from a long long time, but due to time contrain and other stupid reasons I never could. Thanx to my new theme (vacation plan...;)..hehe) to try other fellow bloggers recipes I remembered to make Indira's choley. So here goes the recipe. I just have made few changes like adding some extra tomatoes and lemon juice... as we like our choley a bit khatta (sour)....:P. You can find Indira's Choley Recipe here.Thanx Indira for the lovely recipe. It turned out amazing... very mild flavoured yet so authentic and healthy.Here goes my choley.


You need :

Garbanzo beans / Chickpeas -2 cups (I used canned - if ur using dry ones please soak them overnight in warm water)

Roma Tomatoes - 4 finely chopped

Onions - 1 medium finely chopped

Mustard seeds - 1 tsp

Jeera (cumin seeds) - 1 tsp

Chole Masala / Chana Masala - 1 tbsp ( I used Punjabi choley masala )

Red chilli powder - 1 tsp

Turmeric powder - 1/2 tsp

Salt to taste

oil - 1 tbsp

Fresh Coriander leaves for garnishing

lemon juice - 2 - 3 tsp

Butter - 1/2 tbsp


Method :

If you have soaked the garbanzo, pressure cook it with some water and salt. Dont over cook it. drain the water and keep aside. Alternatively, if ur using canned garbanzo, microwave it with some salt and water for 3 minutes. Keep aside.


Put a handful of garbanzo bean in a blender and make into a smooth and thick paste adding some water.This is done to make the choley a bit thick.


In a pan, heat the oil and add the jeera and mustard seeds.When the seeds splutter, add the onions and saute for a minute or two on medium flame. Let the onions cook well until they become transparent. Now, add the tomatoes and saute well till the tomatoes are tender and pasty.Add the turmeric powder, red chilli powder and chana masala. Mix well. The tomatoes should cook very well and become mushy. The raw smell of the masala should go.

Once the tomatoes are cooked well, add the chickpeas paste and saute well. Add rest of the chickpeas and 1/2 a glass of water and cook well.

Cover and cook for 7-8 minutes. Now, remove the lid and cook till the choley thickens a bit and all the extra water evaporates.See that ur choley is not watery.

Transfer to a serving bowl and garnish with fresh coriander and lemon juice. Mix well and serve hot with Puri / batura or Chapati.

The best indian bread combination to go with choley is the Batura. I will be posting the Batura recipe Next...:) till ten enjoy the lovely choley on my platter :D...


Serve hot with Puri/ Batura or chapati. Enjoy!

Now, a bit about Indira and her Lovely blog. If u wonder what does mahanandi stand for as I wondered when I visited her blog for the first time, Its a beautiful temple town close to Nandyala, India and at the foothills of Nallamala forest range. Its a very very green town surrounded with ponds, lovely forest and century old temples.She has some mindblowing recipes and photographs in her blog. The blog emits amazing creativity in terms of writing, photography, and lovely recipes. I would also like to add that Indira is the brain behind the Jihva (JFI) which is circulating the foodblogsphere now for nearly 2 years. Thanks Indira for the lovely blog and for sharing all your thoughts, ideas and amazing recipes with us. To know more about her do visit her blog. I make a point to check her blog atleast once everyday, yet I cant see I have seen all her recipes. Indira, I enjoyed making your chole amongst so many other recipes I have piled from from ur blog in my "Should try Section".

PS: What is a choley recipe without the batura?... so I am posting that recipe here in this post. Scroll down please.


Batura my hubby's ever favourite, just like the choley. Whenever we go to an indian restaurant, his first order is always puri or batura. So just to satisfy his "batura bud" I thought I will make it at home for him . As I stated earlier I am not a puri or batura fan so I rarely make it at home. I knew that for making this indian bread, U need to prepare before hand. The dough to make batura has to be kept aside for 8 hours or something for fermentation. Hmmm my plans seemed to be doomed, when I came across this amazing and instant Batura recipe. The result was amazing, and just like the Batura u get in restaurants.I found this recipe at Vee's Keep trying. Thanx Vee for the lovely recipe.Here goes the recipe.


You need :

All purpose flour - 2 cups

Yoghurt - 1/4 cup

Potato - 1 boiled and mashed

Oil/ ghee - 2 tbsp

Baking powder - 1/2 tsp

Salt to taste

Oil for deep frying.

Method :

Put all the above ingredients in a bowl .Knead lightly so that the baking podwer is evening mixed. Now knead it into a nice dough with some warm water. Adjust the quatity of water in order to make a soft pliable dough.Keep the dough aside for 1 hour.


When ready make to make ur baturas, Heat oil in a kadhai on medium flame.

Roll a small ball size dough into a nice round . Dont make it very thin. The baturas need to be a bit thick. Once the oil is hot enough, slid the batura into the oil and poke it lightly with the laddle until it puffs up. See that u do this very lightly orelse u may spill oil on urself.This is done tonot make the baturas puff well. Once the baturas puff, let it stay for 30 seconds and then flip them over gently (again take care here.... dont spill hot oil on urself....please :D) to the other side. Once both the sides have light brown spots on them... your baturas are ready. Remove them from the oil and drain them on a tissue paper.

Serve hot with the delicious Choley........


................................The way I did....enjoy!

Now about Vee and her Blog "Keep trying" . As her blog name suggests..she keep trying lovely recipes and share with all of us in her lovely blog. The most interesting thing I found in her blog is her archive listing "On the menu" which is listed in alphabetical order....A....B....C....D...E....F.....G.....Guess she is over dosed teaching her kids. Thats y her blog is having this unique menu listing? :D.Hey dont mind, Just kidding..... You have a lovely blog and I love it.:) She is from konkan and her blog intro is so sweet, as she refers about her lovely grand mom and her mom and what all she learnt from them. She has some interesting recipes and lovely photographs in her blog. So check out more about Vee @ Vee's Keep trying.

So for today, thats it.... I will be back with more of my trials from another favourite blogs of this food blogsphere.

Have a happy weekend.....and do tell me if u liked my chole batura...:)
Wednesday, May 7, 2008

Recipe Today :Meeta's Achari Aloo

Thanks you all for your lovely comments on my previous post i.e : my 100th post.


I am so excited and happy for all the love that I recieved in the form lovely comments and wishes from all of you. It feels so good to know i have so many friends and well wishers...I hope u all enjoyed the chocolate and the halwa..:)


I am so happy and honoured that I wanted show my gratitude, in a small way that I can do. I know thats for any blogger its a thrilling moment when someone tries their recipe and comments on it. Hence I decided the rest of May I dedicate it to YOU. ( All the lovely fellow bloggers out there....)


Yes I decided that I am going to post my favourite recipes from other blogs that I like... along with a sweet note about the blogger and her/ his lovely blog. Yeah, its like a break for me after this hectic hundred. I just want to cook and try all the creative, unique and awesome recipes I have seen in other blogs and always wanted to try it out. But due to time constrain I cudnt.


Even now.... there are like hundreds of blogs out there and thousands of lovely recipes... cant make all so I will be going by mine as well my hubby's choice...:).


Today, I am starting with Meeta's Achari Aloo... from her kitchen to mine..:)


Meeta's Achari Aloo - From her Kitchen to Mine.


The minute I saw this recipe in Meeta's blog I was delighted. I was searching for this recipe say for more than an year but never actually tried to make it. U see I have to give work to my little brain to make something without a proper recipe. Hmm... Anyways y trouble urself when u get an instant recipe...;). You wont believe I made it the day meeta posted the recipe..... and the result was amazing.... it turned out awesome. Thanks Meeta for the lovely recipe. This is what I came up with...:D


My lunch platter for the day! with meeta's achari aloo, Italian green peas Salad, curd, chapati and tomato slices.


I made a few changes like adding extra tomatoes........I used lemon Pachranga pickle and traditional Mango avakai, (cut mango pickle) mixed them together and used that paste. The saunf and mustard seeds in the pachranga pickle and the tangy mango taste and spices in Avakai created a very good combination of taste. And the aroma was awesome.... ummm I can vouch for any pickle lover. its was too tempting.


Rest of the recipe method I followed as Meeta has suggested.Turned out nice.


Here goes the recipe : serves 3


Potatoes - 4 Russet

Roma tomatoes - 2 finely chopped

Jeera (cumin seeds) - 1tsp

Red chilli powder - 1tsp (optional)

Turmeric powder - 1tsp

Onions - 1 finely chopped

The pickle chutney/sauce* - 1 1/2 tbsp

Salt to taste

Pepper a pinch

Fresh coriander leaves to garnish

Oil - 1 tbsp

Method:

Chop the potatoes into wedges and keep aside.

In a deep botton pan, heat the oil and add the jeera to it. Let it splutter for a while. Add the onions and saute well. Once the onions are transparent, add the finely chopped tomatoes and saute again for 5 minutes or so. Add the turmeric powder, Red chilli powder and mix well. Cook till the tomatoes are tender and become like a paste.

Now add the chopped poatoes and mix well. Pour around 1/2 glass of water and cook covered on medium flame for 3 minutes or until the potatoes almost cooked. Now, remove the cover and cook for another 2 minutes allowing the water to eveporate. Now, add the Pickle Sauce and mix well, coating the poataoes well. Add salt and pepper to the potaotes. Adding salt be careful. You already have salt in ur pickle sauce so better taste and then later add the salt to it.

Transfer to a nice serving bowl and garnish with fresh coriander leaves. Your Achari Aloo is ready. Simple yet so tasty..:)

* The pickle chutney is the sauce of the pickle that remain after u remove the pieces from the pickle. For this recipe, we just need the sauce and not the pieces. If ur making this using vegetable pickle, be free to add some pieces too for additional taste... enjoy!

Serve hot with Paratha/ Roti or naan. Enjoy!


Now About The Blog : "What's for lunch Honey?"

Isn't that what we r asked when our sweet hubby comes home for lunch? A very nice blog with a lovely name and even lovelier recipes and photographs. This blog is owned by Meeta as you all must knowing now (As I have already written her name like 6-7 times..hehehe). She is very sweet female, born in India - Mumbai and is presently settled in Germany with her partner a a lovely 5 yr old son. You can read more about her here.
Her blog has some amazing recipes and pictures. I love spending hours in her blog searching for new items and unheard recipes. She is the one who started the Monthly Mingle... if ur aware of it. She is a brilliant photographer and a great cook. Thank you Meeta for sharing your lovely recipes with us. To know more about her do visit her blog.
Thats it for today... I will be back again with another favourite recipe from another lovely blog. Thank you.