Yum yum Black Forest cake. This cake has always been my favourite. I remember eating in monginis...with every extra Rs. 10 that we used to save. This pastry has always been my fav and the same with my hubby. So what better ocassion to make this than for our anniversary..:D I made this one for our 2nd wedding anniversary which was on 8th of december (sorry for posting it sooo late..:d)
I wanted to make it special and had no idea what shud I make. So I took the help of my dessert Queen friend
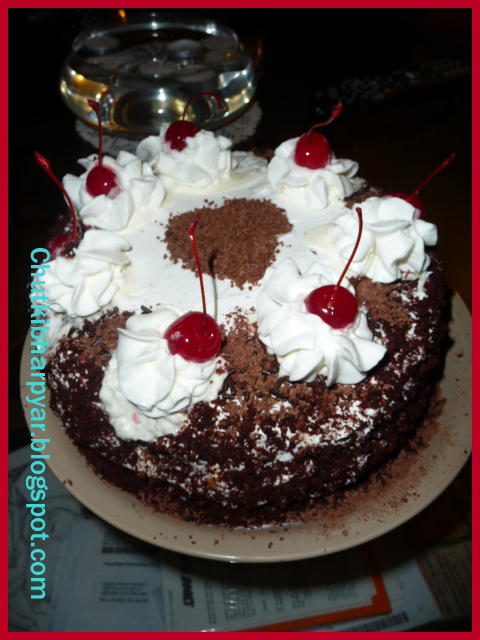
Jeana and ask her to help me out with any of her good recipes. She told me about this one as said that it will be easy too as its made using a mix. The minute I saw the cake I knew I had to try it out. And here I am with the outcome. The beautiful, soft and creamy Black forest cake. Yummm!
You can find Jeana's recipe
here. I will anyways write down the recipe and procedure again here.
For making this awesomely easy and tasty cake u need....
Ingredients:Devil's food cake mix (any brand) - 1 pack
Below ingredients as given on the cake mix...
Eggs - 3 (I used 2 and came out good)
vegetable oil - as on package
Water - as on package
Lite cherry pie filling - 1 can (I used normal cherry pie filling)
Whipped cream - 1 tub (u can find this in the frozen section)
Maraschino Cherries with stem - 7-8
Grated Chocolate -for garnishing
Method :
Preheat the oven to the required temperature to bake the cake. See the temperature Instructions on the cake pack. Mix the ingredients of the cake as given on the package.
Grease a cake pan well (or u can even line in with a parchment sheet.) The Divided the cake batter into two 8' round pans and baked it for 50 minutes. The time may vary from oven to oven so do check ur cake by inserting a toothpick into the centre of the cake. If it comes out clean, ur cake is cooked well. You can even bake the whole cake in one deep 8' pan and then cut it into 2 layers.
Let the cake cool well on a cake rack. Cut the done and the hard sides of the cake and keep it aside.
Open the can of the cherry pie filling and reserve the juice. Sprinkle some cherry reserve juice on both the cakes. Leave it aside for 15 minutes or so. See that u dont make the cake too soggy.
On a cake board, or cake circles (u can get these in Micheals..:D) take one layer of the cake and pipe a dam of whipped cream around the rim of the cake layer so that the filling does on escape to the outer surface.Now scoop out and spread the cherry pie filling in the centre of the cream dam. Spread well and evenly.
Now, place the second cake layer on top of the cream filling. Frost the sides and top of the cake with the whipped cream. Smooth it as fine and smooth as possible. Now remeber the cake dome and side scrapping of the cake...? Crumble that with ur hand and then stick them to the sides of the cake. Try to stick them to the sides as evenly as possible.
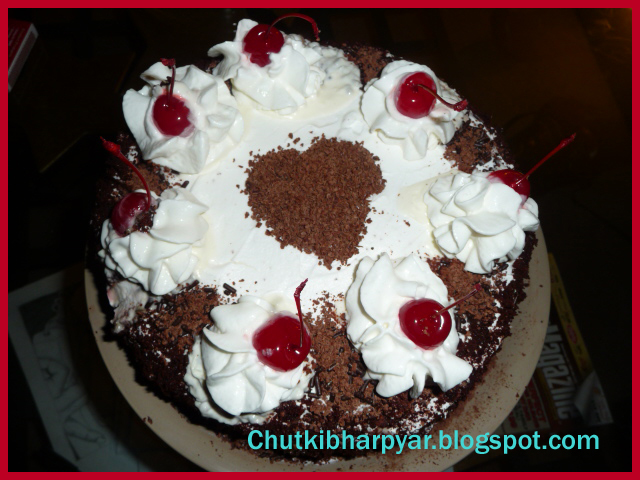
Now comes decorating the cake... You can do it anyways u want... play with the placement of the cream swirls and the cherries. I followed what Jeana had done with her cake. Playing safe..:P
Using the whipped cream in piping bags, make 7 swirls at equal intervals on the top of the cake.
Top the swirls with the stemed cherry, one on each swirl. Decorate the centre with grated chocolate.
*****One small tip. Dont use the canned cream or reddiwhip to make the swirls. They dont last long. I made the swirls on this cake, placed the cherries on top and went for a romantic dinner with hubby and when I came back I cudnt see the swirl anymore just cherry which where actually slipping down the cake. Hmmm thought it was a disaster but somehow managed to tidy it up a bit and get it back. So avoid the canned ones...used whipped cream from the tub.. they stay good..:) Enjoy making this Cake as much as I did..:D
 This was our lovely anniversary evening cake. I had fun making this as it didnt eat up my time...:) I am glad i made this sweettreat and I am sure I will be making it again too.:)
 This yummy sugar dipped ring just takes my heart away, everytime I sink my teeth into it. I love donuts. Yeah I can eat donuts anytime well its the different story that my hubby never allows me to go over indulging on them hehhe. He loves me so much that he watches how many I eat at a time hehhee:P
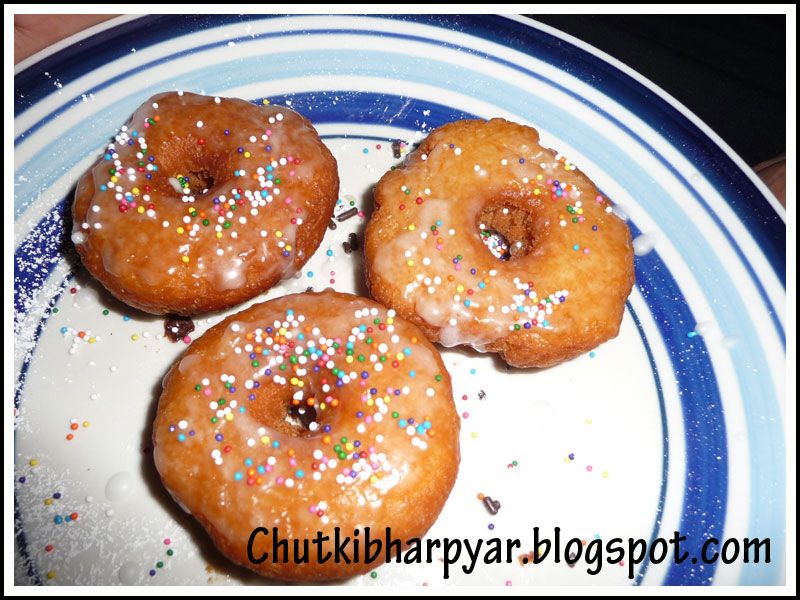


 My hand..... i put this design while in india.. its my own creation (my design)...:D Isnt it good..??:P
 A close up of the design...:)
  Design on the back of the palm..... design in progress...


