WELCOME!


Powered by IP2Location.com

Wednesday, April 30, 2008

Maharashtrian Masala bhaath.....yummy!!


If ur from Maharashtra, Iam so sure u will be knowing about this dish. One of my mom's maharashtrian friend taught her this dish and since then it has become and eternal part of our daily menu. I Remember my mom used to often pack this rice dish in my tiffin box, along with some salad. It used to taste so yummy. Hmmm... It is very very easy to make and is a quicky. It takes less than 30 minutes to be ready...:) So, without wasting anytime I will jump on to the recipe.


You need :

Cooked rice : 3 cups

Onions : 1 medium sliced lenghtwise

Green peas - 1 cup

Potatoes - 2 cut in cubes

Jeera (cumin seeds) - 2 tsp

Tomato - 1 (optional) I skipped it

Turmeric powder - 1 tsp

Kitchen king masala - 1 tsp

Red chilli powder - 1 1/2 tsp

Green chilli - 2 slit

Garam masala - 1tsp

Bay leaves - 3

Fresh Coriander leaves - 1 cup (I didnt have it so I skipped it too)

Salt to taste

Oil - 1tbsp

Method :

In a big pan pour oil and add in the cumin seeds. Let it splutter well. Now add in the bay leaves and the garam masala powder. Stir for 1 minute on medium flame. See that u dont burn the masala. Now add the onions, peas and stir and cook for 3 minutes or till the peas are tender. Now add the tomatoes if ur adding them and stir well again. Once the tomato is tender and mashed, add the potatoes, sprinkle some water and cook covered for 10 minutes.

Now, put all the other masala and salt and stir till the potato cooks well. Once the potato is cooked well add the previously cooked rice to the potatoes mixture and mix well until all the masala is taken in by the rice. Cook covered for 5 minutes keep stirring in between. Now cook uncovered for 6-7 more minutes and remove from flame. Garnish with corinader leaves and if u prefer about 2 tsp of lemon extract. Your Masala bhaath is ready.

Enjoy with Raita. Its a complete meal in a jiffy :D

Tuesday, April 29, 2008

Little hearts Biscuit or Palmiers?? - from Dhivya's Kitchen to Mine..!


Palmiers - Flaky and crunchy, sweet as well salty. When I saw this recipe in Dhivya's blog...it instatntly reminded me of the little hearts biscuits I used to relish on in india. Britania Little heart biscuits. These cute heart biscuits resemble them so much.

I was so happy to see this recipe that I immidiately wanted to try it out. I made this that evening itself and the result was outstanding. It tasted a bit different from the little heart biscuits... but it looked so nice and same...:) Thank u Dhivya for sharing this amazing recipe.

What are palmiers? Palmiers are traditionally frech pastries. A lot of people call these Elephant Ears, but in the European baking world they will always be known as Palmiers.Palmier (pal-mee-ay) is the French word for a palm tree and these cookies are said to resemble palm leaf.Light, buttery, cripsy, sweet french cookie. Takes a little effort the first time through but it's rather fast when you get the hang of it and it looks like you spent forever on them.

I always feel they look like hearts more than palm leaves...... checked out few more snaps of internet, they all look more like hearts.... hmmmm duno y they named it palm leaves... hmm..

Anyways, I made a few changes to the recipe....specially in the timings, and to enhance the flavour in my second batch of these biscuits. You can find the Original recipe from dhivya's blog here. Here goes my recipe with few changes.

You need :

Puff pastry sheets - 1 packet

Powdered Sugar - 3/4 cup

Salt - 2 tsp

Cardamom powder - 1 tbsp

Almond powder - 1 tbsp

Method:

Thaw the pastry sheets in room temperature. Dont microwave it.. I did that mistake so I am warning u. When I tried to defrost the sheets in microwave the edges became soggy....and it was difficult to handle it. So avoid thawing in microwave. Its better to keep it out before hand and allow it to thaw in room temperature.

Keep 1/4 of the total sugar aside and mix the rest of the sugar, cardamom powder and nut powder together. This powder should be fine. Keep it aside.

Dust the kitchen surface with the some sugar powder that we kept aside. Now unfold one of the 2 pastry sheet and dust the inside with some sugar powder. Now sprinkle the nut, sugar and cardamom powder over the sheet and gently press using a rolling pin to press the sugar in completely. Reapeat the same procedure from the other side too.

Fold in the 2 horizontal edges of the pastry to the centre of the pastry...from either sides.Dust with sugar and nut powder and press with a rolling pin. So see the steps with pictures see here. Again take in the folded horizontal edges and get them to the centre. Dust with sugar,nut and cardamom powder and press with a rolling pin. Now once again for the last step... fold the pastry sheet from the middle as in both the horizontal edges meet. Be gently...dont press too hard. Once ur roll is ready. Trim the edges keep aside (u can bake these too). Cut the roll in pieces, sprinkle sugar and nut powder over the pieces and place them in a cookie sheet. Keep about 2 inch space between the cookies. These take in lot of space when they bake. Keep it in the refridgerator for 15 minutes or so allwoing it to set a bit.

Now, bake the cookies @ 350 degree F in a preheated oven for around 10 minutes. Keep checking in between as these cookies become brown too soon. You dont wanna burn your cookies. So, one they become golden brown in colour, take them out. You can be assured they r done.

When I baked in my first batch I covered the cookie sheet with an aluminium foil, hence it took the cookie a lot of time to bake. So if ur baking ur cookie in an aluminium foil sheet, Adjust the time accordingly.When i baked in a foil, it took me nearly 20 minutes for the cookies to become golden brown. Guess its all trial and error. The best way is to keep checking the pastry in between to assure that its not burnt.

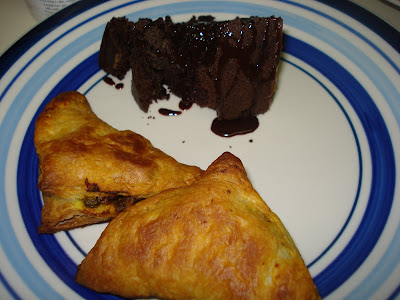
Your cookies are ready. Serve at room temperature. Tastes amazing and crisp when served hot. Enjoy.

Serve these crispy golden beauties with a cup of coffee... for those evening snacks. I am sure you will love it. :)... ENJOY!


Monday, April 28, 2008

Kudos to me - Showing off my First Award !

I was so excited to see my FIRST award given to me by my dear blogger friend Madhavi. The "Yum Blog Award"...woooooooow!!!! I really cant believe it....Thank you sooo much Madhavi for such a lovely award and all the appreciations...U really made my day!... Okie now, about the "Yum Blog Award" .This award was started by Roopa who says that....

"Yummy blog award is the award given to the blog with most yummy recipes/photos"

Here now I am showing off my lovely award.......TADA....!


Isn't it Shinny? uhh uhmmm.. So, here goes my award speech... I dedicate this award to my sweet hubby who always encouraged me... by eating any new recipe (crap) I created.., my lovely family and all my blogger friends and well wishers. Thank you all for always appreciating me and encouraging me. Thank u soo much!

Now about the Award.....

As per the rules I have to share with u guys my favourite desserts that I have prepared / eaten and pass this amazing award to award to four of my fellow bloggers...Both are tough choices to make as I love so many desserts and also there are so many lovely bloggers out there...Anyways...here are myFavourite desserts.

On Nupur's advice I am removing all the pictures I have used earlier on my post from google search. Thanx Nupur to guide me in the right way. Really appreciate it.. Now.. againt o my desserts :D

Chocolate cake : specially Black forest... yummmmmm

Gulab Jamun : hot and soft...yummy-licious...

Kaju Katli : Specially the ones from Haldiram.... yummm I miss them so much....

Chocolate mousse : Chocolate mousse pudding.... yummm!

Now comes the toughest part, giving this lovely award to four food bloggers.... I wanted to give this yummy blog award to all the lovely and creative food bloggers, But I have to choose just four amongst them, which is soooo tough. Hence, as per the rules laid down, I hereby pass this "Yum Blog Award to four bloggers/ blogs......

They are.........

Vaishali of Earth Vegans

Bhags of Crazy Curry

Usha Prasanth of Samaikalamvanga

Nupur of One Hot Stove


Congratulations to all the winners ! You all really deserve it...:)


Rules for the ‘Yummy Blog’ award Receiver :

1. The person who receives the award should display the "Yummy Blog!" logo on their blog and also the meaning of the award which is "Yummy blog award is the award given to the blog with most yummy recipes/photos".

2. The receiver should also quote their favorite yummy-licious :) dessert(s) that they have ever prepared/eaten. Don’t restrict yourself to any dessert, chocolate bars also welcome).3. Also the receiver should pass on the award to four other bloggers whose blog they find "yummy" and let them know about the rules.

Enjoy!.....Thank again Madhavi for making my day....:P


Masala Paav - Paav bhaji in a different form.....:)

" Masala pav is a spicy blend of tomato onion gravy cooked and stuffed inside butter laden pavs.Every pav bhaji vendor serves his own version of Masala Pav so that each one tastes different but equally delicious. Very often the pav bhaji gravy is tossed with pieces of pav and served with a slice of lemon.It is a spicy way to serve bread. Quick and easy!"

This is the only information I found about this Masala Paav when I tried to search its origin. Guess its the brain child of the Chaat and Paav bhaji vendors...who came up with this amazing say of serving paav. I always make this dish for lunch...whenever I make paav bhaji for dinner the previous night. Yeah, this is a dish i make next day just to make the leftover a bit interesting. I somehow feel bored to eat the same thing for the next day. I guess there are many who will nod there heads to this. Right? Who likes to eat the same thing again and again... I dont. So Iam always searching for new recipes and way to make the leftovers interesting.

I ate masala paav for the first time in Grant road, Mumbai.... in a Paav bhaji joint named "Sardaar Paav bhaji Centre". Ohh it was so awesome. That when I came to know that a dish like this existed. It is so easy to make. You can find this dish in any of the paav bhaji joints or paav bhaji "thela" /stalls in mumbai. I simply relish it. Hope u all like it too. :D

Okie... I always make this dish as a leftover.... but u may make and serve it as a different way to serve Paav bhaji...:)

This looks so good... I kept clicking snaps... hmmmm.... lovely and tasty Masala Paav... hmm okie now here goes the recipe.

You need :

Hamburger bun : 4

Onion - 1 medium chopped

Tamarind chutney (optional ) - 1/2 cup

Coriander leaves

Lemon juice - 3 tsp

Paav bhaji (leftover ) - 3 cups ( you can find the recipe for the bhaji here )

Nylon sev - 1 cup


Method :

Butter both the sides of the hamburger buns and then roast it on the tava. Once the bun becomes golden brown on either side. Place the buns on the plate. Keep the base bun on the plate and spread the ( paav bhaji ) Bhaji over it. Now put some spoons of the tamarind chutney to it. This is optional, and you may avoid it. The masala paav yet tastes lovely. Now sprinkle the chopped onions and the freshly chopped coriander on it and cover it with the other bun. Spread butter on the top bun and then spread some more paav bhaji masala over it. Garnish with nylon sev, few drops lemon juice and coriander leaves. Serve it hot. this can be eaten with a spoon. Enjoy!

My hubby relishing the Masala Paav !

Serve hot as Dinner / Lunch or as a snack. No side needed. Its a complete meal in itself....:) Enjoy!


Semiya Payasam to celebrate my award...:)

I love sweets...but as my hubby isnt a sweet-o-holic, I dont often make sweets at home. But today was a day for celebration..... Celeberating my first award, I just made a small cup full of semiya payasam. Just sharing my happiness with you all....with a sweet dish and a nice recipe.

You need :

Roasted Vermicelli (semiya) - 1/2 cup
Milk - 2 cups
Elaichi (cardamom) - 5-6
Roasted Cashew nuts - 8-9
Ghee - 2 tbsp
Sugar - 3/4 cup


Method :
n a pan add the ghee and add the roasted vermicelli to it and mix for a minute or so. Now,take around 1 1/2 glass of water and cook the roasted vermicelli. Once the vermicelli is nicely cooked and the water is somewhat drained. Add the milk and mix well. Add the cruched cardomom powder to it and mix well. Stir inbetween and allow the milk to come to a boil. Add the sugar and mix well. You may add evaprated milk instead of milk for more flavour and fast cooking. Let the payasam thicken a bit. Add the roasted cashew nut and serve hot ot chilled.


Enjoy this lovely sweet dish for any ocassion. Serve hot or Chilled. I like it Chilled. Enjoy!

Friday, April 25, 2008

Avacado and Tofu Chutney - from Vaishali's kitchen to mine.


Now as I said earlier I am dedicating a seperate post for this lovely chutney/ dip recipe.
I found this recipe at vaishali's blog and it immidiately caught my attention.I had to try this recipe then and there and luckily, I had all the needed ingredients needed for this chutney and voila!!... I had a tasty chutney as a side to my crunchy mysore masala dosa.


I made few changes to the original recipe. I grinded the coriander leaves too along with the other ingredients. You can find the original recipe here. This chutney, well u can also call it as a dip, as it is tangy and so flavourful. You can have it as an amazing dip rocking you get together or party. So here goes the recipe, and my changes to the recipe.


Ingredients :

Ripe Avacados - 2 small Pitted and scooped
Tofu - 1 1/2 cups
Ginger - 2 tsp finely chopped or grated
Green chillies - 2 chopped
Fresh coriander - 1/2 cup
salt to taste
Lemon extract - 1 tbsp


Method :

In a blender combine all the ingredients and blend until nice and smooth. Transfer to a nice serving bowl and garnish with freshly chopped coriander if desired. Your tasty, tangy chutney/Dip is ready. Enjoy!!

Thanx vaishali for the amazing recipe i am so sure I will be making it again.


Serve with hot dosas or vadas. Or as a dip for vegetables. Enjoy!!

Wednesday, April 23, 2008

Garlicky Spinach And Mushroom Pasta


Pasta is something we make often. Me and my hubby both love italian food a lot, specially pasta, which tops the list. I like my pasta spicy or like how we get in California pizza kitchen, something like an indian style pasta. Lotsa garlic and lotsa spice. Yuummmmmmmmmmmm!!
So this is my style pasta.....basic oil based garlicky pasta. As i said earlier, in my previous pasta and italian posts that I like my sauce seperate to make my pasta less soggy, So this is a sauceless pasta. You may add sauce to it if u desire and enjoy this lovely Garlicky mushroom spinach pasta.


Ingredients :

Angel hair (spaghetti ) - 1 packet
Spinach - 1 1/2 cup (I used frozen spinach)
Mushroom - 7-8 sliced (divide in 2 parts (1/4 and 3/4 ))
Garlic pods - 1 medium chopped
Oregano - 1 tbsp
Salt to taste
Olive oil - 1 tbsp (add more if u feel ur pasta looks dry or sticky)
Fresh italian / indian parsley (coriander) - 1/2 cup finely chopped
Red chilli flakes - 1 tsp
Sun dried Tomatoes - 5-6 sliced (optional)
Chilli Garlic Paste - 2 tsp (recipe below)


Garlic Chilli Paste Recipe

Ingredients:

Dried red chillies - 6-7
Garlic pods - 6-7 (chopped)
Olive oil - 1/2 tbsp
Salt to taste

Method:
In a blender add all these ingredients and blend them well into a paste.Your Garlic chilli paste is ready. Keep it aside.You can store it in an air tight jar and keep it in the refridgerator for a week.


Method :

In a big pan heat around 9 cups of water. let the water boil and add salt and few tsps of olive oil to the water. when the water starts boiling, add the pasta to the water and allow it to cook a bit (Al Dante). See that u dont overcook ur pasta.Once cooked drain the excess water and allow the pasta to cool well. Keep it aside.

In a pan take some oilive oil and saute the spinach sperately and keep it aside once cooked. Now in the same pan take some butter and saute 1/4 cup of the sliced mushrooms. Allow the mushroom to cook well and fry. Keep aside.

In a seperate pan now take olive oil and add the chopped garlic to it. Saute well and then add in the garlic chilli paste to it. Mix well for few minutes. Now add in 3/4 of the sliced mushrooms and fry well. Once the Mushrooms are cooked well, add the spinach to it and mix well. Add the pasta to it and saute well. Add some olive oil if u feel the pasta is sticking together.Let the pasta cook well for about 10-15 minutes in medium flame. Mix well. Remove from the gas.

Garnish with the fried mushroom and fresh parsley. I dont like chese so i have skipped it, but u may garnish the pasta with some shredded mozarella or parmesan cheese. Mix lightly and serve.
Your amazing and easy Garlicky pasta is ready.


My hubby enjoying his pasta alog with a cup of hot tomato soup.


Serve hot with Tomato soup and french bread slice. Lovely and tasty garlicky pasta. Enjoy!!

Wednesday, April 16, 2008

Ramanavami Speciality - Kosu malli

Shri Rama Chandra ki jai...

Some facts about this day....from the net...:)

Ram Navami is a Hindu holiday. It falls on the ninth day of the Hindu lunar year (or Chaitra Masa Suklapaksha Navami), and is a celebration of the birthday of the Hindu god Rama and on Ramnavmi Shree Bhagwan Swaminarayan was born too in the town of Chhapayia, Uttar Pradesh.

Lord Ram is the seventh incarnation of Lord Vishnu, who takes birth on earth when Adharma over rules Dharma. He protects all his devotees by vanquishing the roots of Adharma. Lord Ram was born on earth to destroy the demon named Ravan.
Hindus normally perform Kalyanotsavam (marriage celebration) with small
murtis of Rama and Sita in their houses, and at the end of the day the deity is taken to a procession on the streets. This day also marks the end of the nine-day utsavam called Chaitra Navaratri (Maharashtra) or Vasanthothsavam (Andhra Pradesh) (festival of Spring), which starts with Gudi Padwa (Maharashtra) or Ugadi (South India). According to recent astrological studies, his year of birth is consider to be January 10, 5114 B.C

Festivals really draw my attention, not due to their mythological importance but due to their....goodies and sweet attractions.So many different sweet varities and prasadams and food varities to eat... hmmm...come one.... who doesnt like festivals now..??


Kosumalli ( or can we call it Raw green gram Salad?)


Sri Rama Chandra ki jai ! Prabhu Sri RamaChadra ki jai ! Sri Ramanavami is here and whats the special favourite for this festival, that I am cooking in my Kitchen?My hubby has lots of sentiments attached to Rama Navami. He remembers and misses his nainamma (granny) for all the variety food she used to make on this day. The way she used to decorate the ram idol for the pooja.And the way she used to enjoy scolding everyone to get ready for the pooja. All those lovely memories of home,india and childhood.He misses all that. Beieng here in US, you dont even get the feel of the festival. So i thought i will make him all the items related to Ram navami and surprise him.


To tell u the truth I had no idea what items are made for Ram navami as we rarely used to make things back in mumbai. It used to just be another holiday for us, enjoy and see TV to the hearts content.Hmmm how much marriage changes someone.... Hmm so i searched the web and found out what kosumalli is...but cudnt get a perfect recipe so created my own.I discovered that i had eaten this thing in so many south indian iyer weddings...but never really knew the name... "kosumalli" , "Koshumburi" ( I still hope this is what it is called...:P)


For kosumalli you need :


Split moong daal : 1 cup
Raw mango - finely chopped : 1/2 cup
Green chilli - Finely chopped : 1 tsp
Fresh coriander leaves - About 1/2 cup
Salt to taste
Freshly grated coconut (frozen is fine too) - 1/2 cup
Lemon juice - 1 tsp (optional)


Method :

Soak the moong daal in luke warm water for around 2-3 hours. Once the moong dal is soaked well... drain all the water and dry the daal on a cloth for around 20 mins, or until all the water is drained and the daal seems dry to touch.


In a big bowl mix all the ingredients along with the moong daal and mix well. Your kosumalli is ready...:) It is so easy and yet so tasty.... Enjoy.. I loved it so much that iam gonna make it often ..os what if its not Ram navami??....:P


Kosu malii freshy made for Rama Navami...Enjoy!

Moon dal Kofta (leftover magic part 3)


Hiii.... says my moong daal wada.... It was missing my blog for nearly 2 weeks now. Remember my previous 2 post where i posted about these lovely moong daal wada and the chaat?

here goes the links...

Moong daal masala wada
http://chutkibharpyar.blogspot.com/2008/04/leftover-magic-moong-daal-1-moong-daal.html

Moong daal dahi wada chaat
http://chutkibharpyar.blogspot.com/2008/04/leftover-magic-moong-daal-2-moong-dahi.html

Well after all the trial and bored with the moong dal wada and chaat... I decided to try something new... and see what I came up with? This tasty moong daal kofta... it turned out so good that I am surely gonna try it again.... leftovers or no leftovers...:P This poor picture was lying in my edit post for nearly 2 weeks (there are several more lying in the edit post for god knows how long.... craving for a write up and to be posted... there chance will come soon....) and I left it there as I felt my blog had got an over dose of moong daal... so now here I am back with the "leftover magic".


My leftover masala moong daal wada


The yummy kofta on its way to perfection and completion


To make this lovely kofta u need :

Moong Daal Wada : 7-8 balls (see previous moong daal masala wada post forthe recipe to make this.)
Yoghurt - 1 cup

Besan (gram flour ) - 2 tbsp

Red chilli powder - 1 tsp

Turmeric powder - 1 1/2 tsp (i love the yellow colour in my curry)

salt to taste

Sugar - 1 tsp

Garam Masala powder - 2 tsp

Oil - 1 tbsp

Bay leaves - 2

Ginger - 1 tsp finely chopped

Fresh coriander leaves for garnishing

Method :

soak the moong daal wadas in warm salted water for 2 minutes, squeeze and keep aside.

In a big bowl, whisk yoghurt and besan together. Heat oil in a pan an add the bay leave to it. Now add the chopped ginger and saute for a minute . Add the garam masala, turmeric powder and red chilli powder and cook in the oil for about 30 seconds on low flame..Add the yoghurt mixture along with salt and sugar. Mix well. If the curry looks too thick, add some water to it to get the consistency of dosa batter. Mix well and allow the curry to boil. Once the curry is boiling add the moong wadas to it. Simmer the curry for 2 more minutes and then remove from flame.Your moong dal kofta curry is ready.

What power this leftover has... it makes a person think so much out of the box....hmmm..So this way the leftover pesarattu batter story ended here, by being transformed into this gorgeous looking kofta curry. Isnt it how life is.... many a times we start with something and end up somewhere else. So true!! enjoy.

Garnish with fresh coriander leaves and serve hot with chapati ot rice.Enjoy!

Mushroom curry puff

Curry puff / Vegetable puff is something you will find in every Iyer bakery or small bakery in India. How I used to love them. Every time I went to Monginis I never used to leave the store without a curry puff or egg puff stuffed in mouth.I was so happy to hear some similar stories from my hubby "R'" after marriage. R is crazy about curry puff and I was so happy to know that he made them once here in US for some potluck party. Hearing this my craving for the puff started and I wanted to try it then and there......He did tell me the method in a brief way...or rather confusing manner.....that I prefered to depend on the internet than on my hubby for the recipe......u know how a bachelor would cook something specially during his school days...here in US...(I am really not trying to accuse all those bachelors who cook sooo well. kudos to u guys..:D.)

I had never used the puff pastry sheets and had no idea how they looked or how I have to work with them......So still confused and craving for the curry puff I kept searching for the perfect recipe... and i stumbled up on this one here...http://sailurecipes.blogspot.com/2008/03/curry-puff.html

Sailu has shown the method of making the curry puff so well that it cleared all my dilemas...:D

I made the masala bhaji on my own with my own ingredients... but u can check the link above for detailed step by step pics...:D

So here goes the recipe :d

You need :

Puff Pastry sheets - 1 pack (u have 2 sheets in these)

Potatoes - 2 diced and boiled

Peas - 1 cup

Mushrooms - 5-6 finely chopped

Red chilli powder - 2 tsp

Garam masala - 2 tsp
Ginger Garlic paste - 2 tsp
Jeera (cumin seeds) - 1tsp

Salt to taste

Oil

Fresh Coriander leaves

Method :

Keep the puff pastry sheet out of the freeze to thaw. Also in the meantine, preheat the oven to 400 degree F .

In the meantime prepare your bhaji for the puff. Take a big pan and pour some oil in it.Heat the oil and add in the cumin seeds and let it splutter. Add the peas to it. Let the peas cook a bit and become soft. I used frozen peas, so it didnt take much time to cook. Now add in the Potatoes and saute well till the potaotes change colour lightly. Now add all the dry masala and mix well. Lastly,add the mushrooms and mix well. Cook the bhaji covered for 5-7 minutes. Now remove the lid and let the vegetables cook on medium heat for about 10 more minutes.Once all the vegetables are cooked remove from gas and keep aside to cool down. Leave the vegetables till they come to room temperature. The filling shoudn't be hot. Wait till it cools down well before stuffing them in the puff.

Now,cut ur puffs pastry sheets in rectangle (As shown in sailu's link above..) or square. If you cut a square, put ur filling in the lower left corner of ur square, brush water to the opposite edges and join the diagonal corners to form a triangle. (I am so sorry I dont have step wise pics of this... will post them when I make my next batch..). I made this way as I wanted small puffs with less filling inside.....U may use the method sailu have given.

Once u have stuffed all ur curry puffs, place them in a cookie sheet or oven proof dishes and bake them. Reduce the heat of the oven to 375degree F and place the puffs in the oven for about 30 - 35 minutes.Once u see that the puff have turned golden brown in colour, off the oven and let it remain inside for 10 mins or so. Now, remove from the oven and serve hot.


Curry puff and a piece of chocolate cake


What more do u need than Tasty hot curry puff and a piece of chocolate cake? Serve hot with Tomato Sauce. A lovely tea time snack.

Roasted Bhindi Masala / Roasted Spicy Okra

Tasty and crispy Bhindi masala. Bhendi is my hubby's alltime favourite. This is one veggie (other than dondakaya) that he can eat non-stop. Somehow, I am so bored to write this today... the introduction to why I made this bhaji, how I made this and wt are the facts.....hmmmm

Somedays writing seems so boring... the mind goes blank... and u dont understand wt ur writing here... guess today is one of those days.....so Iam going to keep this very very brief.... so here I jump to the recipe...


You need :


Okra - 1 lbs

Besan - 1tbsp

Red chilli powder - 1 tsp

Salt to taste

Cumin powder - 1 tsp

Garam masala - 1tsp

Oil - 1 1/2 tbsp


Method:
Wash the bhindi well and dry them on a cloth... Make sure that ur bhindi is completely dry before u start cooking them. Now, snip both the corners of the bhindi and cut them lenghtwise.
Keep aside.

In a seperate bowl, mix the besan, garam masala, cumin seeds, salt and red chilli powder.keep aside.

Take a big pan and add oil to it and let it heat well. Put the cut okra to the pan and toss well. Let the okra cook for some time until u see brown patches on the okra. Now sprinkle in the dry masala we mixed earlier, into the pa. mix well so that masala coats well on the okra. Cover and cook for 5 minutes. After 5 mins remove the cover and cook til the okra is roasted well.


Your roasted Bhindi masala is ready to be served. Okie this recipe takes a bit more oil. You can reduce the amount of oil and cook too, but it will take a long time.


Serve hot with phulkas or chapatis...:D

Monday, April 14, 2008

Happy Vishu / Tamil New Year and Ram navami Wishes!

Happy Vishu


Wish all my friends a very very happy tamil new year, Vishu and Ram navami.
I have been busy since morning.. preparing the special vishu/ Ram navami lunch, which consists of Panagam , parupu koshumbari, Parupu vadai , Sambar, Rasam, Mango rice, Semiya Payasam, Chopped ripe mangoes, Bean podutuval, Plain rice and Neer mor.My camera is giving me some trouble so iam not ablr to upload the snaps. Will do once my camera is fine and will also update the recipes for these items at that time. till them some facts about Ram Navami and Vishu.

Our vishu Special Lunch


Some details about Ram Navami

"Whenever the evil forces reign supreme, the Lord will come to the rescue and set things right. Accordingly Lord Vishnu, the preserver of the Universe (according to the Hindu mythology) has taken 9 "Avatars" or incarnations to eradicate the evil forces and establish goodness and prosperity. (Lord Vishnu is yet to take his 10th Avatar - "Kalki). Of these incarnations, the seventh is the Sri Rama Avatar. Sri Rama Navami marks the birth of Lord Rama. From Ugadi for the next 9 days, we celebrate the Vasantha Navarathri. It concludes with Sri Rama Navami. It is celebrated on the day when "Navami" (9th day after the new/full moon day) and the star "Punarvasu" occur together in the Tamil month of "Chitirai". (Sometimes it might fall in the "Panguni" month also). The Hindu tradition has a lot of meaningful practices. The Tamil months Panguni and Chitirai (April & May) are the hottest months of the year in this part of the world. Hence the "Prasadams" offered to God will be directly related to the weather conditions.

For Sri Rama Navami, the "Prasadams" offered are Panakam, Neer Mor (Diluted Buttermilk), Vadai Paruppu and Panchaamirutham. These items are also prepared at the temples and distributed as prasadams to the devotees who come to seek the blessings of God. All the above mentioned foodstuffs can be taken to bring down the body heat. They also make up for the loss of body fluids due to the excessive perspiration. Apart from the above, in olden days, there was a custom to gift hand-made fans to other people. Since there was no electric fans then, to reduce the effect of the heat, these hand-operated fans were very useful during the summer months. It was indeed a thoughtful gesture."


Something about vishu and the Kanni

"Vishu (Malayalam:à´µിà´·ു)- (American Vjéshu), (Tamil:வீà®·ூ) is astronomical new year day festival held in the state of Kerala in South India (and adjoining areas of Karnataka and Tamil Nadu). Similar festivals are celebrated in Punjab and Assam, in India, around the first day in the Hindu month of Medam (April – May). This occasion signifies the Sun's transit to the zodiac Mesha Mesha Raasi (first zodiac sign) as per Indian astrological calculations. Vishu is also considered as the harvest festival of Kerala and thus the importance of this day to all Malayalees. In Assam this day is called Bihu, in Punjab Baisakhi (originally Vaishakhi) and in Tamil Nadu Tamil Puthandu or Vishu punyakalam. The word "Vishu" in Sanskrit means "equal". Therefore Vishu is more probably denoting one of the equinox days.

Although Vishu (first of Medam) is the astronomical new year day of Kerala, the offical Malayalam new year falls on the first month of Chingam (August - September).
The festival is marked with offerings to the divine called Vishukkani. The offerings consist of a ritual arrangement in the
puja room of auspicious articles like raw rice, fresh linen, golden cucumber, betel leaves, arecanut, metal mirror, the yellow flowers konna (Cassia fistula), and a holy text and coins, in a bell metal vessel called uruli. A lighted bell metal lamp called nilavilakku is also placed alongside. This arrangement is completed the previous night. On the day of Vishu, the custom is to wake up at dawn and go to the puja room with the eyes closed so that the Vishukkani is the first sight of the new season. Since the occasion marks the beginning of Malayalam New Year, it is also considered auspicious to read verses from Hindu Holy book Ramayanam after seeing the "Vishukkani". It is also believed by some that the page of the Ramayanam to which you open up will have a bearing on your life in the coming year. Devotees also throng the well-known temples like Sabarimala Ayyappan Temple, Guruvayur Sree Krishna temple to have a "Vishukkani Kazhcha" on the early hours of "Vishu" day."

Our Vishu arrangement


Something about Tamil new Year

"The Tamil Calendar is used in Tamil Nadu in India, and by the Tamil population in Malaysia, Singapore and Sri Lanka. Its use is now largely restricted to cultural and religious events, with the Gregorian calendar having supplanted it for official use both within and outside India. The Tamil months which are now solar sidereal are in fact named after the old lunar asterisms of Sanskrit. Most of the names, however are greatly corrupted versions of the originals as evidenced by names such as purADam, Adi (or ADam), aippasi, puRaTTasi etc., which were drawn from the Sanskrit purvAshADa, aashaaDA, ashvini and purva-bhadra-pada respectively.[1]

There are several festivals based on the Tamil Hindu calendar. The Tamil New Year follows the nirayan vernal equinox and generally falls on April 13 or 14th of the Gregorian year. In 2008 the DMK Government in Tamil Nadu decreed that the Tamil New Year henceforth will coincide with the starting of the month Suravam (Thai) along with the Pongal festival known elsewhere in India as Makara Sankranti. This coincides with commencement of the Sun's northern shift (Vadapeyarchchi). However, April 13 of 14th marks the first day of the traditional Tamil calendar and this remains a public holiday in both Tamil Nadu and Sri Lanka. Tropical vernal equinox fall around 22 March, and adding 23 degrees of trepidation or oscillation to it, we get the Hindu sidereal or Nirayan Mesha Samkranti (Sun's transition into nirayan Aries). Hence, the Tamil calendar begins with the same date which is observed by most traditional calendars of the rest of India. The 60-year cycle is also very ancient and is observed by most traditional calendars of India and China, and is related to 5 revolutions of Jupiter according to popular belief, or to 60-year orbit of Nakshatras (stars) as mentioned in Surya Siddhanta.

The ancient Tamil people named the 7 days for the 7 celestial bodies as gnayiru, thingal, sevvai, arivan, viyazhan, veLLi and kari. Also Pakkal, a Tamil word was used to indicate "date". Out of the 12 rasis, one rasi hides behind the sun monthly once. The months were named based on the stars shape of the hidden rasi. If it is in the shape of shark fisk (sura meen), then it was named suravam, similarly, kumbam, meenam, mezham, vidai, aadavai, kadakam, madangal, kanni, thuLai, naLi, silai were named."


Our special Vishu lunch... See picture : Beans coconut podituval,Ripe mango pieces, Parupu kosumalli,Mango rice, Semiya payasam, Parupu vadai and plain rice....other items not in picture are panagam, Neer mor, Sambar, Rasam.

Will post all the recipes soon . till then enjoy...!

Have a great time!Enjoy ur day and i hope u have a great year ahead.